Blackstone Griddle Pork Chops Recipe – Juicy & Easy
I’m going to be straight with you – pork chops on the Blackstone might be the single best argument for owning one of these griddles. You get this incredible sear that locks in all the juices, and unlike a regular grill where you’re basically gambling with flare-ups and dry spots, the flat top gives you complete control. The first time I threw pork chops on mine, I couldn’t believe how evenly they cooked. Restaurant-quality crust on the outside, perfectly juicy inside. This isn’t a complicated recipe – we’re keeping it simple with a few key techniques that make all the difference.
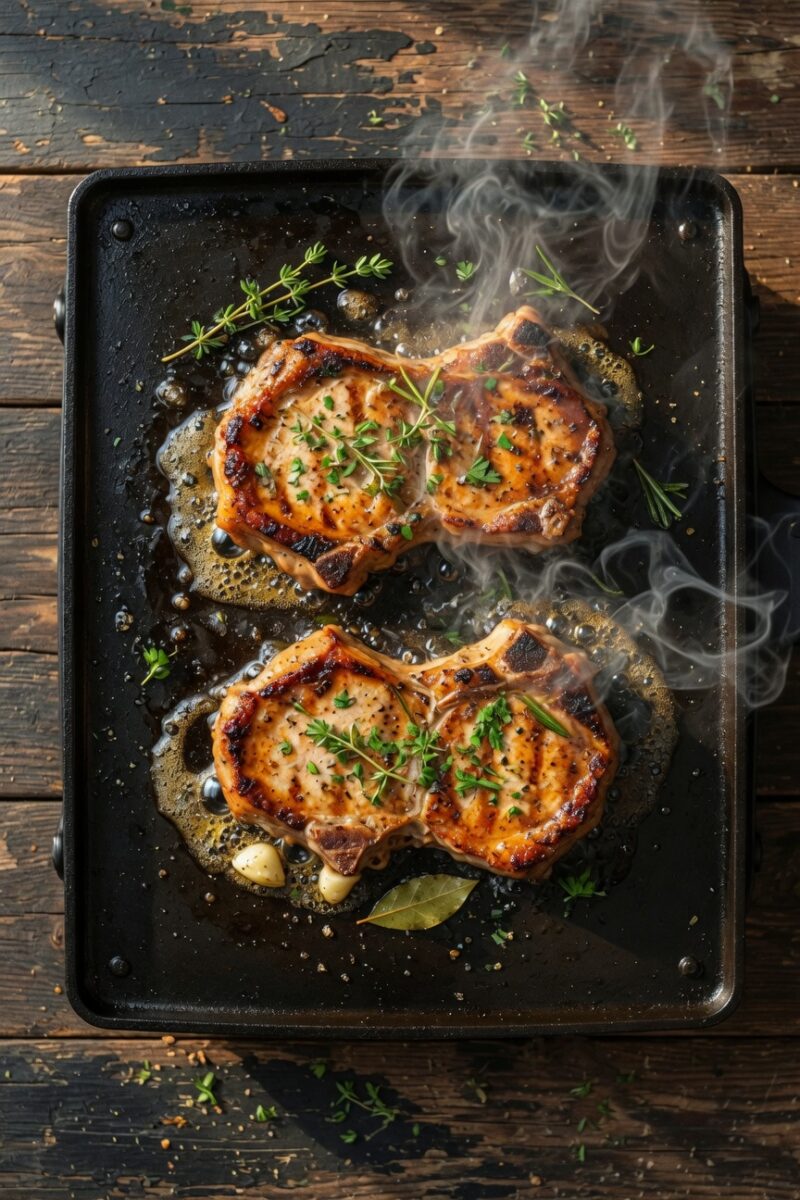
Blackstone Griddle Pork Chops
Ingredients
Method
- Take the pork chops out of the fridge about 30 minutes before cooking. Pat them completely dry with paper towels.
- Mix salt, pepper, garlic powder, onion powder, smoked paprika, and thyme in a small bowl. Drizzle olive oil over both sides of each pork chop, then season generously with the spice mix. Press the seasoning into the meat.
- Turn all burners to high and preheat the griddle for at least 10 minutes until the surface reaches 400 to 450 degrees.
- Add a thin layer of oil to your cooking zone and spread it around with a paper towel held in tongs or a spatula.
- Place pork chops on the griddle, spacing them so they're not touching. Let them cook undisturbed for 4 to 5 minutes until a deep golden-brown crust forms and they release easily from the surface.
- Flip the pork chops and cook for another 4 to 5 minutes on the second side. Reduce heat to medium if the griddle is running very hot.
- When pork chops reach 140 degrees internal temperature, add butter to the griddle around the chops. As it melts, spoon the melted butter over the top of each chop.
- When pork chops reach 145 degrees internal temperature, remove them from the griddle. Transfer to a clean plate and tent loosely with foil.
- Let the pork chops rest for 5 minutes before serving. Garnish with fresh herbs if desired.
Notes
- Use a meat thermometer to check for doneness - pork is safe at 145 degrees internal temperature
- Don't move the chops while they're searing or you'll interrupt the crust formation
- For extra juicy chops, consider brining for 2 to 4 hours: dissolve 1/4 cup salt and 1/4 cup sugar in 4 cups water, then rinse and pat dry before seasoning
- Bone-in chops retain more moisture and flavor than boneless
- Choose chops at least 1 inch thick, ideally 1.5 inches, for best results
Why Pork Chops Work So Well on a Blackstone
Pork chops are honestly the perfect Blackstone candidate. They need high heat for a good sear but can’t take forever or they’ll dry out. The flat top gives you consistent contact across the entire surface, which means no cold spots or uneven cooking. Plus, you can cook four to six chops at once depending on their size, and they’ll all finish at the same time. Try doing that on a regular grill without playing zone defense with your tongs.
The other thing I’ve figured out pretty quickly is that the Blackstone makes it way easier to tell when they’re done. You’re not dealing with grill grates blocking your view or flames messing with your visual cues. You can see exactly what’s happening the whole time.
Choosing the Right Pork Chops
Not all pork chops are created equal, and this matters more than you’d think. Here’s what works best:
Bone-in or boneless? I go bone-in almost every time. The bone helps the chop retain moisture and adds flavor. Plus they just look better on the plate. Boneless works fine too – they cook a little faster, which is the main difference.
Thickness matters. You want chops that are at least one inch thick, ideally closer to 1.5 inches. Thin chops cook so fast that you’ll get them done before you can build a proper crust. Thick chops give you time to work with.
Center-cut is your friend. These are the most consistent and have a good meat-to-fat ratio. Rib chops work great too – they have a little more fat, which means more flavor.
Ingredients
This recipe makes four thick pork chops. Scale up or down as needed.
- 4 bone-in pork chops, 1 to 1.5 inches thick
- 2 tablespoons olive oil
- 2 teaspoons kosher salt
- 1 teaspoon black pepper
- 1 teaspoon garlic powder
- 1 teaspoon onion powder
- 1 teaspoon smoked paprika
- 1/2 teaspoon dried thyme
- 2 tablespoons butter
- Fresh herbs for garnish (optional)
That’s it. We’re not overthinking this.
Step-by-Step Instructions
Step 1: Prep Your Pork Chops
Take the pork chops out of the fridge about 30 minutes before cooking. This is important – cold meat hitting a hot surface doesn’t sear as well, and you’ll get uneven cooking. Pat them completely dry with paper towels. Any moisture on the surface will steam instead of sear, and we don’t want that.
Mix your salt, pepper, garlic powder, onion powder, smoked paprika, and thyme in a small bowl. Drizzle the olive oil over both sides of each pork chop, then season generously with your spice mix. Don’t be shy here. Press the seasoning into the meat a little so it adheres.
Step 2: Preheat Your Blackstone
Turn all your burners to high and let the griddle preheat for at least 10 minutes. You want the surface temp around 400 to 450 degrees. If you have a dual probe thermometer, use it. If not, the water test works – flick a few drops of water on the surface and they should dance around and evaporate within a couple seconds.
This preheat time is non-negotiable. A properly heated griddle is what gives you that restaurant-quality crust.
Step 3: Oil the Griddle
Once your griddle is up to temp, add a thin layer of oil to your cooking zone. I use avocado oil because it has a high smoke point, but vegetable oil or canola work fine too. Spread it around with a paper towel held in tongs or your Blackstone spatula.
Step 4: Sear the Pork Chops
Place your pork chops on the griddle. You should hear an immediate sizzle. If you don’t, your griddle isn’t hot enough. Space them out so they’re not touching – you want air flow and even heat distribution.
Here’s the key: don’t touch them. Let them cook undisturbed for 4 to 5 minutes. This is when the crust develops. I know it’s tempting to check on them or move them around, but resist. The meat will naturally release from the surface when it’s ready to flip. If it’s sticking, it’s not ready.
After 4 to 5 minutes, check one chop. Slide your spatula under it – if it releases easily and you see a deep golden-brown crust, flip them all. If it’s still sticking or looks pale, give it another minute.
Step 5: Finish Cooking
Once you flip them, cook for another 4 to 5 minutes on the second side. At this point, you can reduce your heat to medium if your griddle is running really hot. You’re looking for an internal temp of 145 degrees Fahrenheit. Use a meat thermometer inserted into the thickest part of the chop, avoiding the bone.
When they hit 140 degrees, add a tablespoon of butter to the griddle around the chops. As it melts, tilt the griddle slightly or use your spatula to spoon the melted butter over the top of each chop. This is called basting and it adds incredible richness. If you want even more control over the basting process, a medium square basting cover traps the heat and creates an oven-like environment that helps the chops cook evenly while you baste.
Step 6: Rest and Serve
When your pork chops hit 145 degrees internal temp, pull them off immediately. Transfer them to a clean plate and tent loosely with foil. Let them rest for 5 minutes. This lets the juices redistribute throughout the meat. If you cut into them right away, all those juices run out onto the plate instead of staying in the meat.
After resting, serve them up. They’re great as-is, or you can top with a little extra butter and some fresh herbs if you’re feeling fancy.
Pro Tips for Perfect Pork Chops
Don’t skip the rest. I know I mentioned this above, but it’s worth repeating. Five minutes of patience makes a huge difference in how juicy your chops end up.
Use a meat thermometer. Seriously, just get one. They’re cheap and they eliminate all the guesswork. Pork is safe at 145 degrees, and it’ll still be slightly pink in the center. That’s what you want. Overcooked pork is sad pork.
Consider a brine. If you have time, a simple brine makes pork chops even more forgiving. Dissolve 1/4 cup of salt and 1/4 cup of sugar in 4 cups of water, submerge your chops, and refrigerate for 2 to 4 hours. Rinse and pat dry before seasoning. Brined chops stay juicier even if you slightly overcook them.
Keep your griddle clean between batches. If you’re cooking a lot of chops, scrape down the surface between batches. Burnt bits from the first round will stick to the second round and taste bitter.
Try a reverse sear for thick chops. If you’re working with chops that are 2 inches thick or more, start them on lower heat (around 300 degrees) until they hit 130 degrees internal, then crank the heat and sear both sides. This gives you more control and a more evenly cooked interior.
Common Mistakes to Avoid
The biggest mistake people make is cooking pork chops too long. Pork used to need to be cooked to 160 degrees or higher, but the USDA changed their guidelines years ago. At 145 degrees, pork is safe and still juicy. Past that, you’re just drying it out.
Another common issue is not getting the griddle hot enough before adding the meat. If your surface isn’t properly preheated, the pork chops will stick and steam instead of sear. You need that initial blast of high heat for the crust.
Moving the chops around too much is another one. I get it – you want to check on them. But every time you lift them up, you interrupt the searing process. Put them down, set a timer, and walk away.
Using too much oil is surprisingly common too. You need just enough to coat the surface. Too much and you’re basically shallow frying, which makes everything greasy and can cause flare-ups if any drips down into your grease trap.
Finally, not letting the meat come to room temperature before cooking creates uneven results. The outside overcooks while the inside is still cold. Just 30 minutes on the counter makes a huge difference.
Variations and Flavor Ideas
The basic recipe above is my go-to, but here are some ways to switch it up:
Asian-style: Replace the seasoning blend with a mixture of soy sauce, ginger, garlic, and a little brown sugar. Marinate for an hour before cooking.
Maple mustard: Mix 2 tablespoons Dijon mustard with 2 tablespoons maple syrup and brush on during the last minute of cooking.
Italian herbs: Use Italian seasoning instead of the paprika and thyme, and add some grated Parmesan in the last 30 seconds.
Spicy Southwest: Add cumin and chili powder to your seasoning mix, and top with fresh lime juice after cooking.
Apple cider glaze: Reduce apple cider with a little butter and thyme in a separate pan, then drizzle over the finished chops.
What to Serve with Blackstone Pork Chops
Since your griddle is already hot, you might as well use it for sides too. Grilled vegetables work great – just toss asparagus, zucchini, or bell peppers with oil and seasoning and cook them alongside the pork chops in a different zone.
Smashed potatoes are incredible on the Blackstone. Boil small potatoes until tender, smash them flat on the griddle, and crisp them up in butter. Takes maybe 10 minutes and they’re way better than anything you’d make in the oven.
A simple salad balances out the richness of the pork. Or if you want to go full comfort food, mac and cheese never hurt anybody.
Frequently Asked Questions
What temperature should I cook pork chops on a Blackstone?
Preheat your griddle to 400 to 450 degrees for the initial sear. You can reduce to medium (around 350 degrees) after flipping if needed. The pork itself should reach an internal temperature of 145 degrees.
How long does it take to cook pork chops on a Blackstone?
For 1 to 1.5 inch thick chops, figure about 4 to 5 minutes per side, so roughly 8 to 10 minutes total cooking time. Thicker chops take longer. Always use a meat thermometer instead of relying on time alone.
Do I need to oil the griddle or the meat?
Both. A light coating of oil on the meat helps the seasoning stick and promotes browning. Oil on the griddle surface prevents sticking. You don’t need much of either.
Can I cook frozen pork chops on a Blackstone?
You can, but I wouldn’t recommend it. Frozen chops release a lot of moisture as they thaw, which prevents proper searing. They also cook unevenly. If you’re in a pinch, thaw them in cold water first – takes about 30 minutes for individually packaged chops.
Why are my pork chops tough?
Almost always overcooking. Pork gets tough when it’s cooked past 150 degrees or so. Use a thermometer and pull them at exactly 145. Also make sure you’re letting them rest – cutting into them immediately makes them seem tougher because all the juice runs out.
Can I marinate pork chops before cooking them on the Blackstone?
Absolutely. Just make sure you pat them very dry before putting them on the griddle. Excess marinade will cause them to steam and prevent a good crust from forming.
Should I use bone-in or boneless pork chops?
Bone-in chops stay juicier and have better flavor, but boneless are more convenient and cook slightly faster. Both work great on the Blackstone. It’s really personal preference.
How do I know when my pork chops are done without a thermometer?
Honestly, get a thermometer – they’re like 15 bucks. But if you absolutely don’t have one, press the center of the chop with your finger. It should feel firm but still have a little give, similar to the flesh at the base of your thumb when you touch your thumb to your middle finger. But seriously, just get a thermometer.
Final Thoughts
Pork chops were one of the first things I cooked when I got my Blackstone, and they’re still in my regular rotation. They’re fast, hard to mess up once you know the basics, and they taste way better than anything you’d make in a pan on the stove. The even heat distribution and the ability to get a perfect sear on both sides makes the griddle ideal for this kind of thing.
The key points: get thick chops, let them come to room temperature, preheat your griddle properly, don’t move them around while they’re cooking, and pull them off at 145 degrees. Do those things and you’ll have perfect pork chops every single time.
Start with the basic recipe here and then experiment with different seasonings and glazes once you get comfortable with the technique. There’s really no wrong direction to take this – pork is versatile and takes to just about any flavor profile you throw at it.
Now get out there and make some pork chops.