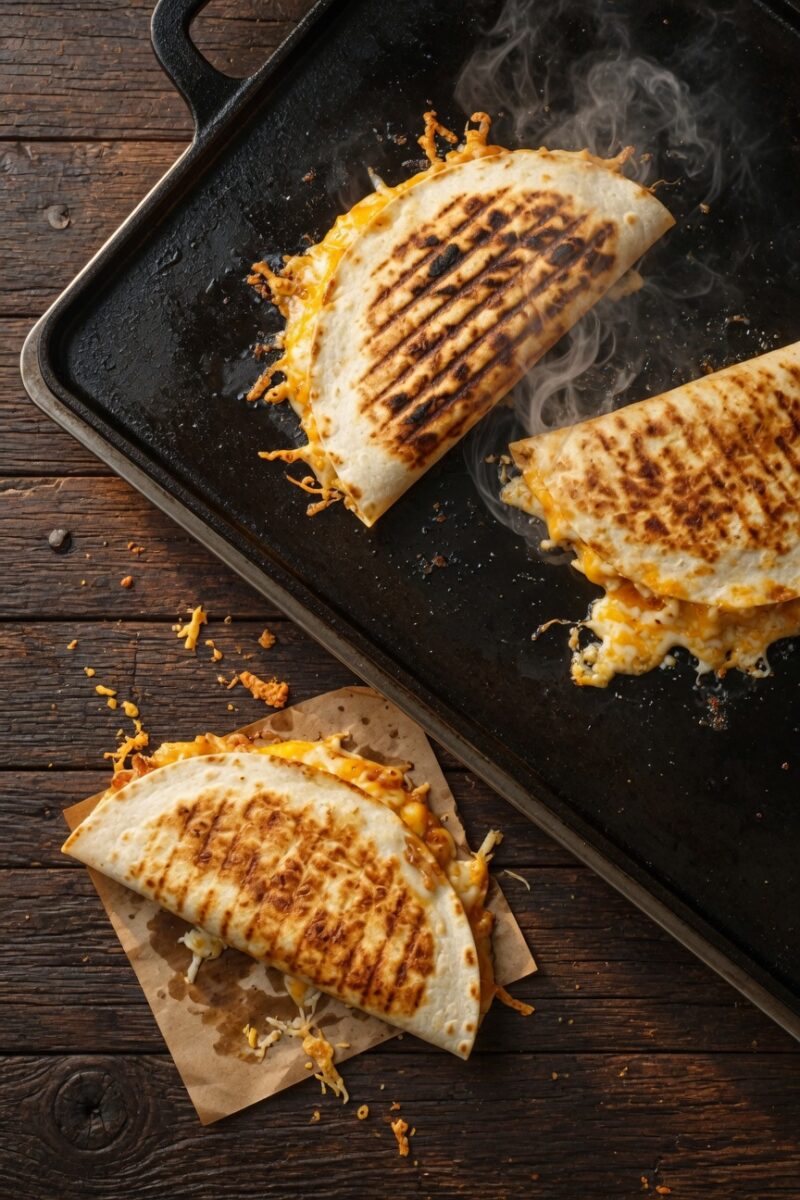
Blackstone Quesadillas Recipe – Easy Griddle Guide
Look, I’ve been cooking on my Blackstone since April, and quesadillas might be the single best thing I’ve made on it. They come out ridiculously crispy on the outside with perfectly melted cheese inside, and you can crank out enough to feed a crowd in about ten minutes. After dealing with quesadillas sticking to pans and burning in spots on my stove for years, doing them on the griddle feels like cheating in the best possible way.
Blackstone Griddle Quesadillas
Ingredients
Method
- Turn your griddle to medium-low heat, around 300-325°F. Let the griddle preheat for about 5 minutes so the temperature evens out across the whole surface.
- Once the griddle is up to temp, add a small amount of butter or oil, about 0.5 tablespoon per quesadilla. Spread it around with your spatula so you have a thin, even layer.
- Place your first tortilla flat on the buttered section of the griddle. Add about 0.75 cup of shredded cheese per quesadilla directly onto the tortilla, spreading it evenly and leaving about half an inch around the edges.
- If adding other fillings, put them on top of the first layer of cheese. Use about 0.25 cup of cooked chicken or a few tablespoons of peppers and onions per quesadilla.
- Place the second tortilla on top and press down gently with your spatula.
- After about 2-3 minutes, use your spatula to lift an edge and check the bottom. When the bottom is golden brown, flip the quesadilla in one confident motion.
- Cook the second side for another 2-3 minutes, pressing down on the quesadilla with your spatula a few times to help everything compress and meld together.
- The quesadilla is done when both sides are golden brown and you can see melted cheese around the edges.
- Transfer the quesadilla to a cutting board and let it sit for about 1 minute before cutting.
- Cut into quarters or sixths with a pizza cutter or sharp knife. Serve immediately with desired toppings.
Notes
- Griddle temperature should be 300-325°F, which is medium-low heat, lower than most other griddle cooking
- Use butter or oil before each quesadilla to prevent sticking
- Don't overfill quesadillas or they will be difficult to flip and cheese won't distribute evenly
- For best results, let cooked fillings come to room temperature before adding
- If using vegetables like peppers and onions, cook them on the griddle first before assembling quesadillas
- Can cook 3-4 quesadillas at once on a 36-inch Blackstone griddle
- Letting quesadilla rest for 1 minute before cutting prevents cheese from oozing out
The flat top gives you complete control over the temperature, you’ve got room to cook six or eight quesadillas at once, and that even heat distribution means every single one comes out golden brown without any of those weird pale spots you get in a regular pan. Plus cleanup is just scraping and wiping, which is about a thousand times easier than dealing with a cheese-crusted skillet.
Here’s exactly how to nail quesadillas on your Blackstone, including the temps that actually work and the mistakes I see people making all the time.
What Makes Blackstone Quesadillas Different
The game-changer is the surface area and heat control. On a stovetop, you’re limited to whatever fits in your pan, and the heat distribution is always a little uneven. On the Blackstone, you’ve got 720 square inches of perfectly flat cooking surface that holds a consistent temperature.
That means you can set up different heat zones if you want to keep some warm while cooking others, or you can cook a dozen quesadillas in the time it would take to do three or four in a pan. The cheese melts evenly, the tortillas get crispy without burning, and you’re not standing there babysitting one quesadilla at a time while everyone waits.
The other thing is the weight distribution. On the griddle, you can press down evenly on the whole quesadilla with a spatula, which helps everything meld together and gives you that restaurant-quality crispness.
Ingredients for Basic Blackstone Quesadillas
This makes about 4 large quesadillas, which feeds 4 people as a main or 6-8 as an appetizer.
- 8 large flour tortillas (burrito size, around 10 inches)
- 3 cups shredded cheese (Mexican blend, cheddar, or Monterey Jack)
- 2 tablespoons butter or oil for the griddle
- Optional fillings: cooked chicken, beef, pulled pork, sautéed peppers and onions, black beans, corn
- For serving: sour cream, salsa, guacamole
That’s the basic setup. The beauty of quesadillas is you can fill them with basically anything. I’ve done breakfast quesadillas with scrambled eggs and bacon, leftover steak quesadillas, even just cheese when I’m being lazy. They all work.
Prep Work Before You Fire Up the Griddle
Get everything ready before you turn on the heat. This is one of those things where once you start cooking, it moves fast, and you don’t want to be hunting around for cheese or fillings.
If you’re using any cooked fillings like chicken or steak, have them cooked and ready to go. If you’re adding vegetables, I actually recommend cooking them on the griddle first, then setting them aside. Peppers and onions take longer to cook than the quesadilla itself, so you can’t just throw raw vegetables in there and expect them to be done.
Have your cheese shredded and your tortillas counted out. Set up a cutting board nearby where you can transfer the finished quesadillas. Get your spatulas ready because you’ll need them for flipping.
Step-by-Step Instructions
Step 1: Preheat Your Blackstone
Turn your griddle to medium-low heat. On my 36-inch Blackstone, that’s usually the “2” setting on the knobs. You want the surface temperature around 300-325°F. If you’ve got a dual probe thermometer, use it. If not, you can test it by flicking a few drops of water on the surface. They should sizzle and evaporate in a couple seconds, but not instantly.
This is way lower than you’d use for burgers or smash burgers. The mistake most people make is cooking quesadillas too hot. High heat burns the tortilla before the cheese melts, and you end up with a crispy shell full of barely-warm shredded cheese. Not what we’re going for.
Let the griddle preheat for about 5 minutes so the temperature evens out across the whole surface.
Step 2: Prep Your Cooking Surface
Once the griddle is up to temp, add a small amount of butter or oil. I use butter because it tastes better, but oil works fine too and won’t burn quite as easily.
You don’t need much. Maybe half a tablespoon per quesadilla. Spread it around with your spatula so you’ve got a thin, even layer wherever you’re placing your tortillas.
Step 3: Build Your Quesadillas
Place your first tortilla flat on the buttered section of the griddle. Work quickly but don’t rush. Add your cheese directly onto the tortilla while it’s already on the griddle. Use about 3/4 cup of shredded cheese per quesadilla, and spread it evenly, leaving about half an inch around the edges.
If you’re adding other fillings, put them on top of the first layer of cheese. Don’t overload it. A quarter cup of cooked chicken or a few tablespoons of peppers and onions is plenty. Too much filling and your quesadilla won’t stay together and the cheese won’t bind everything properly.
Place the second tortilla on top and press down gently with your spatula. The bottom tortilla should just be starting to turn golden at this point.
Step 4: The First Flip
This happens faster than you think. After about 2-3 minutes, use your spatula to lift an edge and check the bottom. You’re looking for an even golden brown color. If it’s pale, give it another minute. If it’s getting dark spots, your heat is too high.
When the bottom is golden, slide your spatula under the quesadilla and flip it in one confident motion. The cheese should be starting to melt by now, which helps hold the two tortillas together. If your flip isn’t perfect and things shift a little, just press everything back into place with your spatula.
Step 5: Finish Cooking
Cook the second side for another 2-3 minutes. You can press down on the quesadilla with your spatula a few times to help everything compress and meld together. This also helps create that crispy exterior.
The quesadilla is done when both sides are golden brown and you can see melted cheese around the edges. If you’re unsure, you can lift it with your spatula and peek at the bottom.
Step 6: Rest and Cut
Transfer the quesadilla to your cutting board and let it sit for about a minute before cutting. This lets the cheese set up slightly so it doesn’t all ooze out when you slice into it.
Cut into quarters or sixths with a pizza cutter or sharp knife. Serve immediately with whatever toppings you want.
Pro Tips for Perfect Quesadillas Every Time
Use the right cheese. Pre-shredded cheese melts fine, but it has anti-caking agents that can make it a little grainy. If you want restaurant-quality results, shred your own cheese. It melts smoother and tastes better. That said, I use pre-shredded most of the time because I’m lazy and it still works great.
Layer your cheese strategically. If you’re using fillings like chicken or vegetables, put down a layer of cheese first, add your fillings, then add more cheese on top. The cheese acts like glue and holds everything together.
Keep the heat lower than you think. Seriously, medium-low is your friend here. It feels wrong when you’re used to cranking the griddle up to high for burgers, but quesadillas need gentler heat. You want the inside to melt before the outside burns.
Don’t overfill. A stuffed quesadilla sounds great in theory but it’s a nightmare to flip and the cheese won’t distribute evenly. Keep your fillings to a reasonable amount and you’ll have much better results.
Work in batches if feeding a crowd. One of the best things about the Blackstone is you can cook multiple quesadillas at once. I usually do three or four at a time on my 36-inch griddle. Just make sure you give yourself enough room to flip each one without crowding.
Use two spatulas for flipping. If you’re nervous about the flip, use one spatula to lift and another to support and guide. Once you get the hang of it, you can do it with one, but there’s no shame in using two.
Common Mistakes and How to Avoid Them
Cooking too hot. This is the number one mistake. Your tortilla will burn before your cheese melts, and you’ll end up with a crunchy shell full of cold cheese. Keep it at 300-325°F and be patient.
Not preheating long enough. If your griddle isn’t fully preheated, you’ll get uneven cooking. Give it a solid 5 minutes to come up to temperature.
Using cold fillings. If you’re adding cooked chicken or steak straight from the fridge, it cools down the cheese and prevents even melting. Let your fillings come to room temperature, or better yet, warm them up on the griddle first.
Flipping too early. If the bottom tortilla hasn’t had time to crisp up and develop structure, your quesadilla will fall apart when you flip it. Wait until you’ve got a solid golden-brown base before attempting the flip.
Skipping the butter or oil. You need some fat on the griddle surface. It’s what creates that crispy, golden exterior. Without it, your tortilla will just dry out and get tough.
Cutting immediately. I know it’s tempting to cut right into a hot quesadilla, but give it a minute. The cheese needs to set slightly or it’ll all pour out the sides when you slice it.
Variations to Try
Once you’ve got the basic technique down, quesadillas on the Blackstone become this incredibly versatile meal that you can adapt to whatever you have on hand.
Chicken and Peppers: Season chicken breasts with cumin, chili powder, and garlic powder. Cook them on the griddle, then dice them up. Sauté some bell peppers and onions. Load everything into your quesadilla with pepper jack cheese for some heat.
Breakfast Quesadillas: Scramble some eggs on the griddle, cook some bacon or sausage, then build quesadillas with the eggs, meat, cheddar cheese, and maybe some diced tomatoes. These are unbelievable.
BBQ Pulled Pork: If you’ve got leftover pulled pork, warm it up on the griddle with some extra BBQ sauce, then use it as a filling with cheddar and a little red onion. The sweet and tangy BBQ with the crispy tortilla is an amazing combination.
Steak and Mushroom: Dice up leftover steak, sauté some mushrooms and onions on the griddle, then build quesadillas with a mixture of mozzarella and provolone. Add a little horseradish sauce after cooking if you’re feeling fancy.
Just Cheese: Honestly, don’t sleep on a plain cheese quesadilla. With the right cheese and proper technique, a simple cheese quesadilla off the Blackstone is legitimately delicious. Sometimes simple is best.
Frequently Asked Questions
What temperature should I cook quesadillas on a Blackstone?
Aim for 300-325°F, which is medium-low heat. This gives the cheese time to melt completely before the tortilla burns. It’s much lower than you’d use for most other griddle cooking, but it’s essential for quesadillas.
How do I keep quesadillas from sticking to the griddle?
Use butter or oil on the cooking surface and make sure your griddle is properly seasoned. If your quesadilla is sticking, it usually means you didn’t use enough fat or your griddle needs to be re-seasoned.
Can I use corn tortillas instead of flour?
You can, but they behave differently. Corn tortillas are more delicate and prone to cracking. If you’re using corn tortillas, warm them slightly first to make them more pliable, and be extra gentle when flipping. Flour tortillas are more forgiving and give you that crispy texture most people expect.
How many quesadillas can I cook at once?
On a 36-inch Blackstone, I can comfortably do three or four at a time with room to maneuver for flipping. You could probably squeeze in five or six if you’re confident with your spatula work. On smaller griddles, adjust accordingly.
Should I oil the griddle between each batch?
Yes, add a little butter or oil before each quesadilla. You don’t need to re-oil the entire griddle, just the spot where you’re placing the next tortilla.
Can I make quesadillas ahead of time?
You can, but they’re definitely best fresh off the griddle. If you need to prep ahead, you can have all your fillings ready and cheese shredded, then cook the quesadillas when you’re ready to serve. If you absolutely have to make them in advance, reheat them on the griddle at low heat for a couple minutes per side to re-crisp them.
Why is my cheese not melting?
Either your heat is too high and the outside is cooking too fast, or your fillings are too cold and bringing down the temperature. Make sure your griddle is at the right temp and your fillings are at room temperature or warmed.
Do I need to clean the griddle between batches?
Not usually. You might get some cheese residue that you can scrape off with your Blackstone scraper, but you don’t need to do a full cleaning between quesadillas. Save the proper cleaning for when you’re done cooking.
Why Quesadillas Are Perfect for the Blackstone
The more I use my griddle, the more I realize quesadillas might be one of those dishes that’s actually better on a Blackstone than any other cooking method. The even heat, the massive cooking surface, the easy temperature control—it all comes together perfectly for quesadillas.
In a skillet, you’re limited by size and you get hot spots. On a grill, the grates make things complicated and cheese drips through. In the oven, you can do multiple quesadillas but you don’t get that crispy texture. The Blackstone solves all of those problems.
You get restaurant-quality results, you can feed a crowd quickly, and cleanup is straightforward. Plus once you nail the basic technique, you can experiment with endless filling combinations and they all work the same way.
If you just got your Blackstone and you’re still figuring out what to cook on it, start with quesadillas. They’re approachable, hard to completely mess up as long as you watch your temperature, and they’ll give you confidence with your spatula work and heat management. And they taste amazing, which doesn’t hurt.
Keep your heat medium-low, don’t overfill them, and give that first side enough time to get golden and crispy before you flip. Do that and you’ll be cranking out perfect quesadillas every single time. If you’re looking to expand your Mexican cooking on the griddle, check out some taco holder stands for your next taco night—they work great for keeping everything organized while you cook.