Blackstone Hash Brown Recipe Crispy and Golden Brown
Look, I’m just going to say it: if you’re not making hash browns on your Blackstone, you’re missing out on one of the best things this griddle can do. I got mine back in April, and after working through the usual burgers and breakfast stuff, I decided to tackle the holy grail of breakfast potatoes. You know what I’m talking about – those perfectly crispy, golden-brown hash browns that are crunchy on the outside and tender on the inside. The kind you get at a good diner and wonder why yours at home never turn out the same. Well, turns out the Blackstone is basically built for this exact thing, and once you nail the technique, you’ll never want hash browns any other way.
Blackstone Griddle Hash Browns
Ingredients
Method
- Peel potatoes if desired. Shred potatoes using a box grater on the large holes or a food processor with shredding disc.
- Place shredded potatoes in a large bowl and fill with cold water. Swish around with your hands to release starch. Drain and repeat 3 times until water stays pretty clear.
- Transfer potatoes to a clean dish towel, wrap up, and squeeze firmly to remove as much water as possible. Spread on paper towels and pat dry again thoroughly.
- Preheat Blackstone griddle to medium-high heat, 375-400 degrees. Let preheat for 10 minutes.
- Add oil to preheated griddle and spread with spatula to coat an area about 12x18 inches. Oil should shimmer but not smoke.
- Dump dried shredded potatoes onto oiled area. Spread into an even layer about 0.25 to 0.5 inch thick. Press down firmly with spatula to create contact with griddle surface.
- Sprinkle salt, pepper, garlic powder, and paprika over the top. Let cook undisturbed for 5-7 minutes until bottom is deep golden brown and crispy.
- Add butter in small pieces around the edges and let melt. Break hash brown sheet into 4-6 sections with spatula and flip each section. Press down again with spatula.
- Cook for another 5-7 minutes until second side is equally crispy and golden.
- In the last 1-2 minutes, break hash brown sections into smaller chunks and spread out a bit. Toss around a few times to get all sides crispy.
- Scrape off onto a plate and serve immediately.
Notes
- Use russet potatoes, not Yukon golds or red potatoes, for best crisping results.
- Removing excess starch and drying potatoes thoroughly is critical for crispy hash browns.
- Don't flip too early - wait until hash browns naturally release from griddle.
- A temperature gun is helpful to maintain 375-400 degrees surface temperature.
- Frozen shredded potatoes can be substituted if thawed and excess moisture is squeezed out.
- Variations: add diced onions, shredded cheese, cayenne pepper, or fresh herbs.
- Hash browns are best served immediately and lose crispiness quickly.
The flat top surface gives you something a regular pan just can’t compete with – even, consistent heat across a huge cooking area. No cold spots, no crowding, just perfect crisping real estate. I’ve made these probably a dozen times since April, tweaking things each time, and I finally figured out what actually works versus what just sounds good in theory.
Why the Blackstone Makes Perfect Hash Browns
Before we get into the recipe, let me explain why this thing is a game changer for hash browns specifically. First, you’ve got space. You can spread your potatoes out in a thin, even layer without piling them on top of each other. That’s critical because crowded potatoes steam instead of crisp. Second, the heat distribution is incredibly even. My 36-inch griddle maintains temperature like nothing I’ve used before. And third – and this is huge – you can press down on the hash browns with a big spatula and get that restaurant-style smashed crispy texture. Try doing that in a regular pan without making a mess.
The first time I made these, Bronco and Gunner went absolutely nuts. I think it’s the combination of sizzling potatoes and butter that drives them crazy. Now every time I fire up the griddle for breakfast, they’re out there before I am.
Ingredients You’ll Need
Here’s what you need for about four servings. This is the formula I’ve settled on after trying it a bunch of different ways:
- 4 medium russet potatoes (about 2 pounds total)
- 3 tablespoons of vegetable oil or canola oil
- 2 tablespoons of butter
- 1 teaspoon of salt
- 1/2 teaspoon of black pepper
- 1/2 teaspoon of garlic powder (optional but I like it)
- 1/4 teaspoon of paprika (optional, adds color and a tiny bit of flavor)
That’s it. Don’t overcomplicate it. I’ve seen recipes that add all kinds of stuff, but honestly, great hash browns are about technique and texture, not a million ingredients. I keep my seasonings in restaurant squeeze bottles now which makes it super easy to add oil and distribute seasonings evenly across the griddle.
About the Potatoes
Use russets. I tried Yukon golds once thinking they’d be creamier, and they just didn’t crisp up the same way. Russets have more starch, less moisture, and that’s what you want here. The starch is what creates that incredible crispy crust.
Step-by-Step Instructions
Step 1: Prep Your Potatoes
Peel your potatoes if you want, or leave the skins on. I go back and forth. Sierra likes them peeled, I kind of like the skins, so I usually compromise and do a mix. Either way works fine.
Now here’s where people mess up – you need to shred these. I use a box grater on the large holes. Takes maybe five minutes for all four potatoes. You can use a food processor with a shredding disc if you want to save time, but honestly, the box grater works great and is one less thing to clean.
Step 2: Remove the Starch (This is Critical)
This is the step that makes or breaks your hash browns. Put your shredded potatoes in a large bowl and fill it with cold water. Swish them around with your hands. You’ll see the water get cloudy – that’s the starch coming out. Drain that water and repeat. I usually do this three times until the water stays pretty clear.
Then comes the really important part: you need to get these potatoes as dry as possible. I dump them into a clean dish towel, wrap it up, and squeeze like I’m trying to wring out a wet swimsuit. You’ll be shocked how much water comes out. Then I spread them out on paper towels and pat them dry again. I know this seems excessive, but wet potatoes will not crisp. They’ll steam and turn into a mushy mess. Trust me on this one.
Step 3: Preheat Your Blackstone
Turn your Blackstone on to medium-high heat. On my griddle, I set the burners to about 375-400 degrees. If you have a dual probe infrared thermometer, you’re looking for a surface temp around 375-400 degrees – this thing has been a game changer for knowing exactly when my griddle is ready. Let it preheat for a good 10 minutes.
You want it hot enough to sizzle and crisp, but not so hot that the outside burns before the inside cooks through. I learned this the hard way my second attempt when I cranked it too high and ended up with potatoes that were charred outside and basically raw inside.
Step 4: Oil the Griddle
Once your griddle is preheated, add your oil. I use about 3 tablespoons of vegetable oil because it has a high smoke point and neutral flavor. Spread it around with your spatula to coat a good area – I usually make a rectangle about 12×18 inches. The oil should shimmer but not smoke.
Step 5: Add Your Potatoes
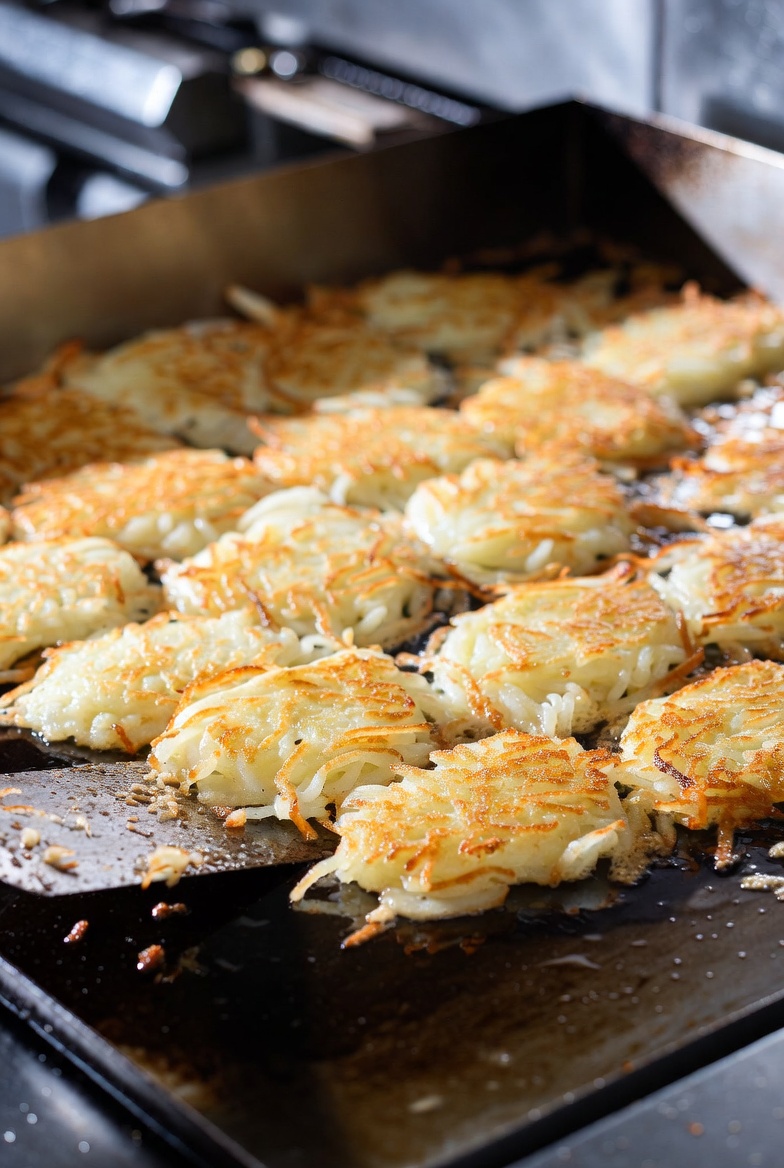
Dump your dried, shredded potatoes onto the oiled area. Use your spatula to spread them out into an even layer about a quarter to half inch thick. Don’t make it too thick or the middle won’t cook through. Don’t make it too thin or you won’t get that tender inside texture.
Here’s a key move: once you spread them out, press down firmly with your spatula. Really smash them into the griddle. This creates better contact with the hot surface and helps form that crispy crust.
Step 6: Season and Wait
Sprinkle your salt, pepper, garlic powder, and paprika over the top. Now comes the hard part – leave them alone. Don’t touch them. Don’t peek under them. Don’t mess with them. Let them cook undisturbed for about 5-7 minutes.
This was tough for me to learn because you want to check on them, but every time you lift them or move them, you interrupt the crisping process. You’ll know they’re ready to flip when you can slide your spatula underneath and they move as one piece. The bottom should be deep golden brown and crispy.
Step 7: Add Butter and Flip
This is where it gets good. Add your butter in small pieces around the edges and let it melt onto the griddle. Then break your hash brown sheet into 4-6 sections with your spatula and flip each section. The butter will help create even more crispy, golden deliciousness on the second side.
Press down again with your spatula after flipping. Cook for another 5-7 minutes until the second side is equally crispy and golden.
Step 8: Final Crisping
Here’s a pro move I figured out: in the last minute or two, break up your hash brown sections into smaller chunks and spread them out a bit. This exposes more surface area to the heat and creates extra crispy edges. Toss them around a few times to get all sides crispy.
Step 9: Serve Immediately
Scrape them off onto a plate and serve right away. Hash browns wait for no one. They’re best within minutes of coming off the griddle when they’re at peak crispiness.
Pro Tips I’ve Learned
After making these a bunch of times over the past few weeks, here are the things that really make a difference:
- Dry those potatoes aggressively. I can’t emphasize this enough. The single biggest mistake is not removing enough moisture. When I thought I had dried them enough the first couple times, I hadn’t. Really go for it.
- Don’t flip too early. I know you want to check, but wait until they naturally release from the griddle. If you try to flip too soon, they’ll tear apart and you’ll lose all that crispy crust you’re building.
- Keep your heat consistent. If your griddle has hot spots or you notice uneven cooking, rotate your hash browns to a different zone halfway through the first side.
- The butter matters. Adding it before the flip gives you richer flavor and helps with browning. Don’t skip it.
- Make more than you think you need. These disappear fast. I’ve started doing double batches because four servings somehow only feeds two people when they’re this good.
- Season both sides. I add most seasoning to the top before the first flip, but I’ll also add a bit more salt after flipping to season the second side.
- Use a good metal spatula. You need something sturdy to press down and flip these. A flimsy spatula won’t cut it.
Common Mistakes to Avoid
I’ve made pretty much every mistake possible with these, so let me save you some trouble:
Mistake 1: Skipping the Starch Removal
I thought this was optional the first time. It’s not. If you skip the cold water rinse and don’t remove that excess starch, your hash browns will stick together in a gluey mess and won’t crisp properly. Just do it.
Mistake 2: Not Drying the Potatoes Enough
I’m repeating this because it’s that important. Moisture is the enemy of crispiness. Every bit of water you leave in those potatoes is working against you.
Mistake 3: Cooking on Too Low Heat
If your griddle isn’t hot enough, the potatoes will cook through but never develop that crispy crust. You need that high heat to get the Maillard reaction going and create those crispy, golden edges.
Mistake 4: Cooking on Too High Heat
On the flip side, too hot and you’ll char the outside before the inside is tender. This happened to me once when I wasn’t paying attention to my temperature. The sweet spot is 375-400 degrees.
Mistake 5: Moving Them Around Too Much
Let them sit and do their thing. Constant flipping or stirring prevents that crust from forming. You want extended contact with the hot surface.
Mistake 6: Piling Them Too Thick
A thick layer means the middle stays soft and doesn’t cook evenly. Keep it to about a quarter to half inch thick max.
Mistake 7: Using the Wrong Potatoes
Waxy potatoes like red potatoes or Yukon golds don’t have enough starch to crisp properly. Stick with russets.
Variations Worth Trying
Once you’ve got the basic technique down, you can get creative. I’ve tried a few variations that worked really well:
Add diced onions: Throw in half a cup of finely diced onions with the potatoes. They caramelize on the griddle and add great flavor. Mix them in before you put the potatoes on the griddle.
Cheese hash browns: About a minute before they’re done, sprinkle shredded cheddar over the top. Let it melt right there on the griddle. For this, I like using a basting cover to trap the heat and help the cheese melt evenly. Incredible.
Spicy version: Add some cayenne pepper or red pepper flakes to your seasoning mix. Goes great with eggs.
Garlic and herb: Increase the garlic powder and add some dried parsley or chives. Makes them feel fancier somehow.
What to Serve With Them
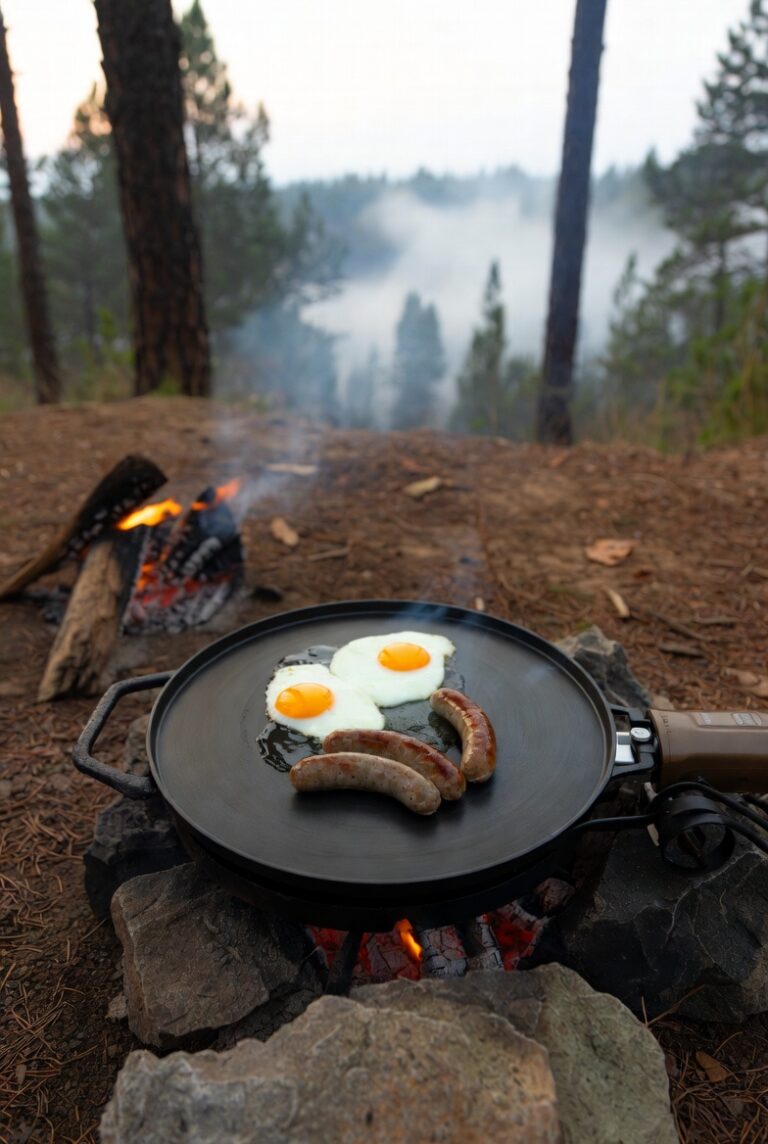
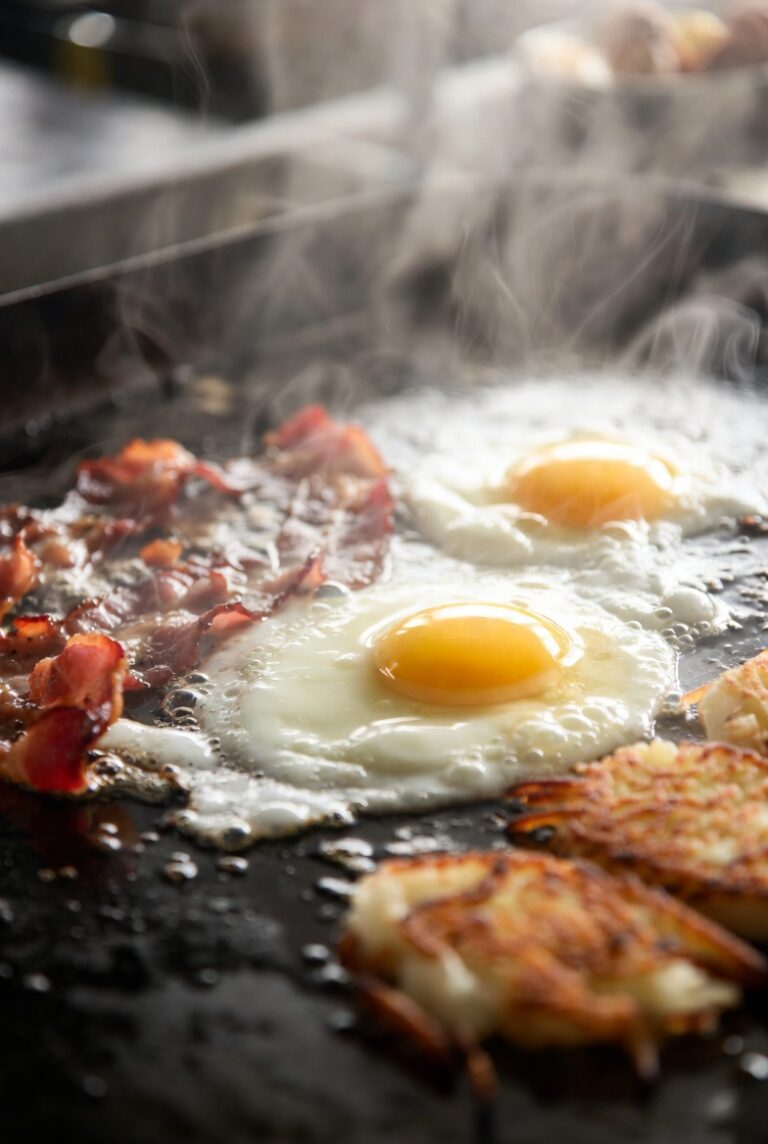
These hash browns are perfect alongside pretty much any breakfast. I usually make them with scrambled eggs and bacon. The great thing about the Blackstone is you can cook everything at once – bacon on one zone, eggs on another, hash browns on a third. Breakfast for the whole family done in 15 minutes.
They’re also excellent with sausage gravy poured over them if you’re feeling ambitious. Or top them with a fried egg and some hot sauce for a complete breakfast in one.
Frequently Asked Questions
Can I use frozen shredded potatoes?
Honestly, yes. I tried this one morning when I was running short on time. The frozen hash browns from the bag actually work pretty well because they’re already partially dried out. Just thaw them first and squeeze out any excess moisture. They won’t be quite as good as fresh, but they’re way faster and still come out crispy on the Blackstone.
Do I need to parboil the potatoes first?
No. I’ve seen recipes that do this, but it’s unnecessary and adds extra time. Raw shredded potatoes cooked properly on the Blackstone will give you exactly the texture you want.
Can I make these ahead of time?
Not really. Hash browns are best fresh off the griddle. They lose their crispiness pretty quickly. If you need to make them for a crowd, keep your griddle on low and transfer cooked hash browns to a cooler zone to keep warm while you make more batches.
What if my hash browns are sticking?
You either didn’t use enough oil, your griddle wasn’t hot enough, or you’re trying to flip too early. Make sure you have a good layer of oil, wait until the surface is properly preheated, and don’t flip until the bottom is golden and releases easily.
How do I clean the griddle after making hash browns?
While it’s still warm, scrape off any stuck bits with your spatula. Then wipe it down with paper towels. If there’s buildup, you can pour a little water on the warm griddle (carefully – it’ll steam), let it loosen the stuck bits, then scrape and wipe. I usually do a quick re-seasoning with a thin layer of oil after cleaning.
Can I add vegetables to these?
Sure. Finely diced bell peppers or jalapeños work well mixed in with the potatoes. Just make sure whatever you add isn’t too wet, or you’ll run into the same moisture issues that prevent crisping.
What temperature should I aim for?
375-400 degrees Fahrenheit is the sweet spot. If you don’t have a temperature gun, you can test by flicking a few drops of water on the griddle. They should sizzle and evaporate quickly but not instantly.
Why This Recipe Works
The magic here is really about understanding what makes hash browns crispy and then using the Blackstone’s strengths to maximize that. The even heat distribution means every bit of potato gets the same treatment. The large flat surface means you can spread them thin without crowding. And the ability to press down firmly creates that contact that develops the crust.
Traditional stovetop hash browns in a pan are limited by space and uneven heat. You usually end up with some parts perfect and other parts either undercooked or burnt. The Blackstone just eliminates those problems. It’s honestly hard to mess these up once you understand the basics.
Final Thoughts
IThe first batch might not be perfect while you dial in your heat and timing, but by the second or third try, you’ll have it down.
What surprised me most about getting the Blackstone is how much better it makes simple things. I expected it to be good for burgers and steaks, and it is. But it’s these breakfast basics – hash browns, eggs, bacon – where it really shines. There’s something about having all that cooking space at consistent heat that just makes everything better.
If you’ve been making hash browns in a regular pan and wondering why they never turn out like restaurant hash browns, this is your answer. The Blackstone gives you the same advantage a diner has – a big, flat, evenly heated surface. Once you make them this way, you won’t go back.
Now if you’ll excuse me, I’m pretty sure Bronco and Gunner just heard me typing about hash browns and they think that means it’s griddle time. The dogs have developed an almost supernatural ability to sense when I’m even thinking about cooking on that thing.