Easy Blackstone Breakfast for Beginners Guide
Look, I’m just gonna say it right up front—if you told me three months ago that I’d be the guy waking up early on a Saturday morning, EXCITED to cook breakfast outside, I would’ve laughed in your face. But here we are. I bought my first Blackstone griddle in April, and honestly? It’s changed my entire breakfast game. Sierra thinks I’ve lost my mind, but she’s not complaining when I’m serving up diner-quality food in our backyard in East Hampton.
The thing about the Blackstone that got me hooked immediately is how ridiculously easy it makes breakfast. I’m talking easier than your stove, easier than a skillet, and way more fun. Plus, Bronco and Gunner have figured out that when they hear that griddle fire up, there’s a solid chance some bacon might accidentally fall their way. They literally sprint to the back door now.
If you’re a complete beginner like I was just a few weeks ago, this guide is for you. I’m gonna walk you through the easiest, most foolproof Blackstone breakfast that’ll make you look like you actually know what you’re doing. Spoiler alert: you don’t need to know what you’re doing. That’s the beauty of this thing.
Why Blackstone Breakfast Hits Different
Before we dive into the actual cooking, let me tell you why breakfast on a Blackstone is genuinely superior to cooking inside. First off, the flat top surface is HUGE. My 36-inch griddle has enough room to cook bacon, eggs, hash browns, and toast all at the same time. No rotating pans, no waiting for one thing to finish before starting another. Everything cooks together and finishes together.
Second, the cleanup is insane. Or I guess I should say the lack of cleanup. You’re not dirtying up your kitchen, no pans in the sink, no grease splatter all over your stovetop. You cook outside, scrape the griddle, and you’re done. Sierra was skeptical about this until the first Sunday morning when she realized she didn’t have to clean the kitchen after breakfast. Now she’s my biggest supporter.
Third, and this is gonna sound weird, but cooking outside just makes breakfast taste better. Maybe it’s the outdoor vibe, maybe it’s the even heat distribution, or maybe I’m just losing it. But trust me on this one.
What You’re Gonna Cook Today
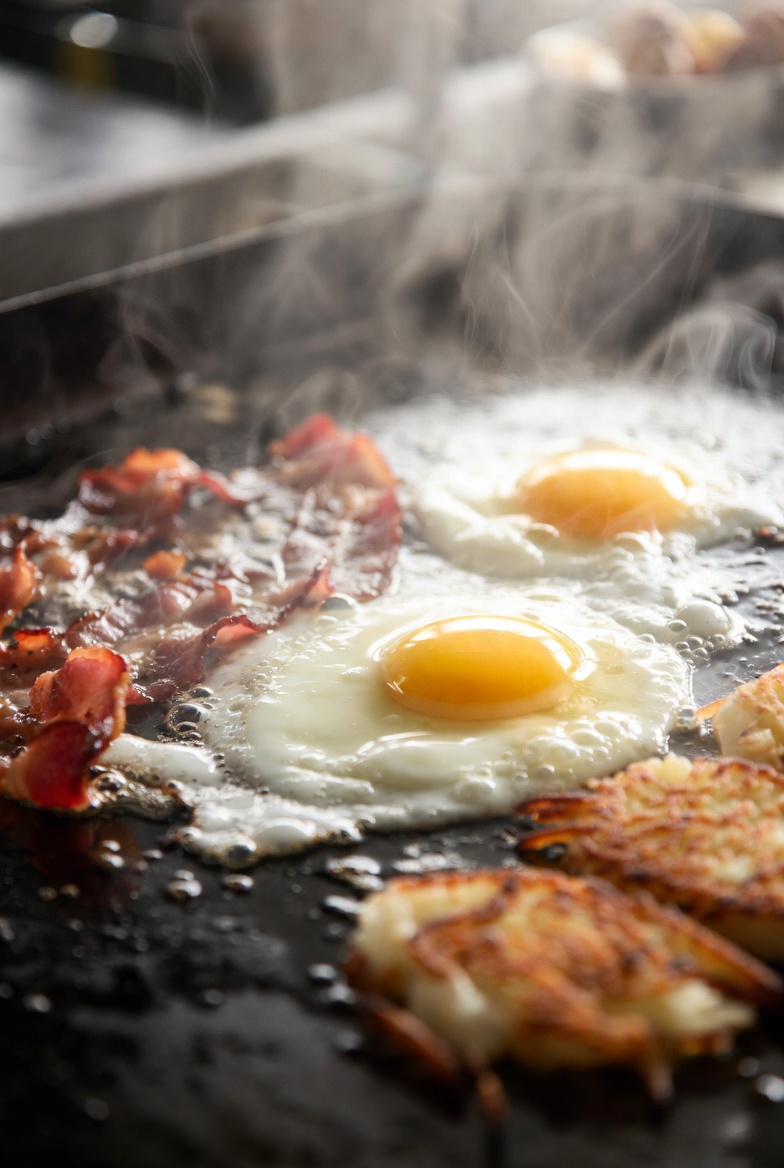
We’re keeping this super simple because you’re just starting out. This is the exact breakfast I made about two weeks after getting my Blackstone, and it’s the one I keep coming back to because it’s literally impossible to mess up. We’re making the classic diner breakfast: bacon, scrambled eggs, hash browns, and toast. Nothing fancy, nothing complicated, just solid breakfast food that’ll make you feel like a griddle master.
Ingredients You’ll Need
Here’s your shopping list. I’m writing this for about 4 people because that’s the sweet spot for the 36-inch griddle, but you can obviously adjust based on who you’re feeding:
- 1 pound of bacon (I go with thick-cut because I’m not a monster)
- 8 eggs
- 1/4 cup of milk or heavy cream
- 1 bag of frozen hash browns (the shredded kind, not the patties)
- 8 slices of bread (white, wheat, sourdough—whatever you’re into)
- Butter (you’re gonna need more than you think, maybe 4-6 tablespoons)
- Salt and pepper
- Cheese if you want (I usually throw some shredded cheddar on the eggs)
- Cooking oil or spray (I use canola or avocado oil)
That’s it. Nothing weird, nothing you don’t already have or can’t grab at any grocery store. This is beginner-friendly all the way.
Equipment Check
Before you fire up that griddle, make sure you’ve got:
- Metal spatulas (I have two and use them constantly—get the ones made for flat top grills)
- A big bowl for mixing eggs
- A whisk or fork
- Tongs for flipping bacon
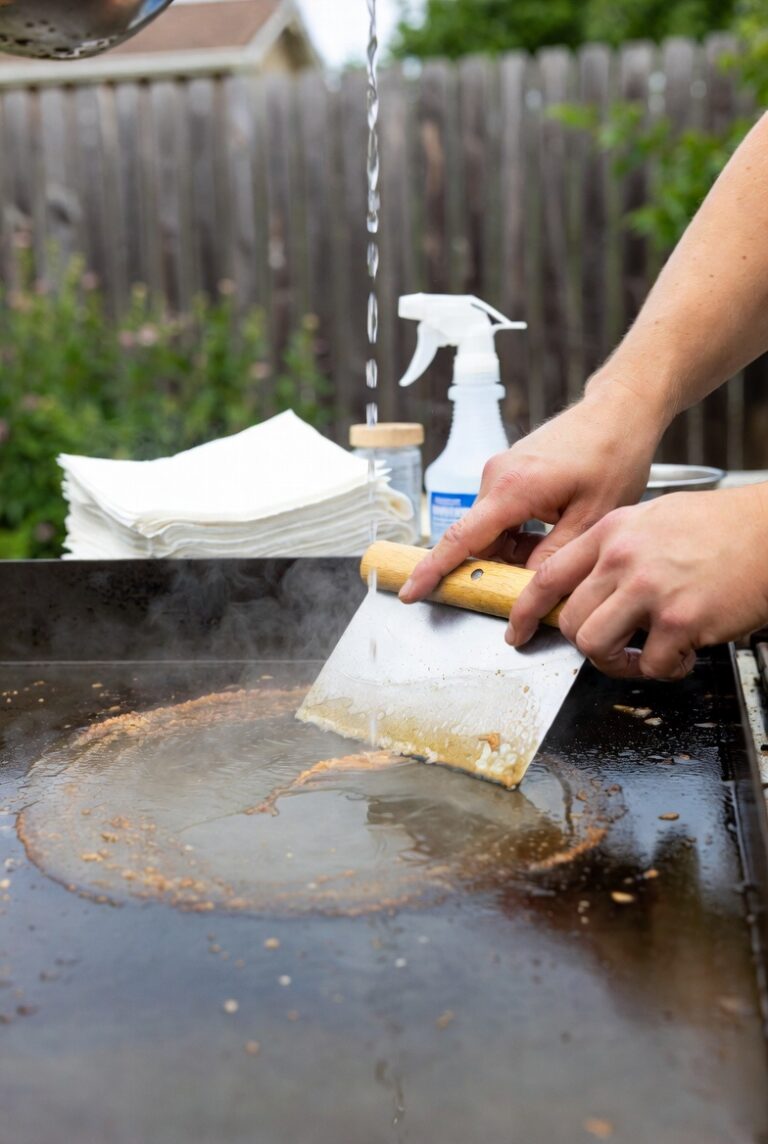
- A squirt bottle with water (you’ll see why)
- Paper towels
- Plates ready to go because this food comes off hot and fast
Step-by-Step Instructions
Step 1: Preheat Your Griddle
Okay, turn on your Blackstone and set all the burners to medium heat. For most griddles, that’s around the 2 or 3 setting if you’ve got knobs with numbers. You want the surface temp to hit about 325-350°F. If you’ve got a dual probe infrared thermometer, use it—seriously, this thing has been a game changer for knowing exactly when my griddle is ready. If you don’t have one yet, just do the water test—flick a few drops of water on the griddle. If they sizzle and evaporate in a couple seconds, you’re ready.
This preheat takes about 10 minutes. Don’t rush it. I made that mistake my first week and everything cooked unevenly. Let the whole surface come up to temp.
Step 2: Start With the Bacon
Bacon goes first because it takes the longest and also because it’s gonna give you some beautiful grease to cook everything else in. Lay your bacon strips directly on the griddle. You don’t need any oil or butter—bacon’s got plenty of fat on its own.
Keep your heat at medium (325-350°F). Bacon on a Blackstone cooks way faster than in a pan, so watch it. We’re talking maybe 4-6 minutes total depending on thickness. Flip it once or twice with your tongs. You want it crispy but not burnt.
Here’s a pro tip I learned like three weeks in: don’t crowd the bacon. Leave a little space between strips so the fat renders properly. Once it’s done, move it to the side of the griddle where it’s cooler, or just take it off and put it on a paper towel-lined plate.
Step 3: Hash Browns Time
Now you’ve got bacon grease on the griddle. This is exactly where you want to be. Crank one zone of your griddle up to medium-high (around 375-400°F). Toss a couple tablespoons of butter on that zone and let it melt into the bacon grease.
Dump your frozen hash browns right onto that buttery, bacony section. Spread them out into an even layer about a quarter-inch thick. Don’t mess with them. Seriously, just leave them alone for about 4-5 minutes. This is the hardest part for beginners because you want to flip and poke and move stuff around. Don’t. Let them get crispy and golden on the bottom.
After 4-5 minutes, use your spatulas to flip sections of the hash browns. They should be golden brown and crispy. If they’re not, give them another minute. Once you flip them, let the other side crisp up for another 3-4 minutes. Season with salt and pepper. When they’re done, move them to a cooler zone to keep warm.
Step 4: Scrambled Eggs
While the hash browns are doing their second side, crack your eggs into a bowl. Add the milk or cream, a good pinch of salt, and some pepper. Whisk it up until everything’s combined and a little frothy. This is basic scrambled eggs—nothing fancy. I actually keep my whisked eggs in one of those restaurant squeeze bottles now because it makes pouring them onto the griddle so much easier and cleaner—plus you can store any leftover egg mixture in the fridge for next time.
On a medium-heat zone of your griddle (about 300-325°F), drop a tablespoon of butter. Let it melt and coat an area about the size of a large dinner plate. Pour your egg mixture right onto that buttered zone.
Here’s where the Blackstone shines. Use your spatula to gently push the eggs from the outside toward the center. The eggs cook fast on a flat top, so keep them moving. You’re looking for soft, fluffy curds, not a flat egg pancake. This whole process takes maybe 2-3 minutes. When the eggs still look slightly wet but are mostly cooked, take them off. They’ll keep cooking from residual heat. If you want cheese, sprinkle it on right before you pull them off.
Step 5: Toast
This is the easiest part and honestly one of my favorite Blackstone discoveries. You can make perfect toast on this thing. On a medium zone (around 325°F), add a small pat of butter for each slice of bread. Lay the bread right on the buttered surface. It’ll toast in about 1-2 minutes per side. You get this amazing crispy, buttery texture that’s way better than a toaster. Trust me on this.
Flip once with your spatula, toast the other side, and you’re done.
Bringing It All Together
This is the beauty of the Blackstone. By the time your toast is done, everything else is either finished or staying warm on the cooler zones of your griddle. You can plate everything at once, and it’s all hot. It’s like having a professional kitchen setup in your backyard.
I usually let Sierra and the boys know food’s ready about 2 minutes before I pull the toast off. By the time they’re outside with plates, everything’s perfect. Bronco and Gunner position themselves strategically near my feet, hoping for bacon casualties.
Pro Tips I’ve Learned
Okay, I’ve only been doing this since April, but I’ve already learned a few things that would’ve saved me some trial and error:
- Use butter liberally. The Blackstone is big, and butter not only prevents sticking but adds incredible flavor. Don’t be shy with it.
- Create heat zones. You’ve got multiple burners for a reason. Keep one zone high for searing or crisping, one medium for most cooking, and one low for keeping stuff warm. Game changer.
- The water squirt bottle is magic. If something’s getting too crispy or you need to deglaze an area quickly, a quick squirt of water creates steam and helps you clean up burnt bits while cooking.
- Invest in good spatulas. The cheap plastic ones don’t cut it. Get metal ones designed for griddles. You’ll use them constantly.
- Don’t cook eggs on high heat. I learned this the hard way. High heat makes them rubbery and weird. Medium heat gives you those diner-style fluffy eggs.
- Prep everything before you start. Once that griddle is hot, things move fast. Have your eggs whisked, bacon ready, hash browns opened, bread sliced. You’re basically running a short-order kitchen.
Common Mistakes Beginners Make
I’ve made literally all of these mistakes in my first couple months, so learn from my pain:
Not Preheating Long Enough
I was impatient my first few times. I’d turn it on, wait like 3 minutes, and start cooking. Everything cooked unevenly and stuck to the surface. Give it the full 10 minutes to preheat. Your food will thank you.
Cooking Everything on High Heat
High heat seems like it would cook faster, right? Wrong. You just burn the outside and undercook the inside. Medium heat is your friend for breakfast foods. The only time I crank it up is for the initial hash brown crisp.
Overcrowding the Griddle
Even though the Blackstone is huge, you need space between items for even cooking. My first big breakfast, I tried to cook for like 6 people and just crammed everything on there. It was a mess. Give your food room to breathe.
Moving Food Around Too Much
This was my biggest issue starting out. I wanted to constantly flip, stir, and move stuff. Sometimes you need to just let food sit and develop that crust or crispy texture. This is especially true for hash browns and bacon.
Forgetting to Season
The Blackstone doesn’t magically season your food. You still need to add salt and pepper. I kept forgetting this in my first couple weeks and wondering why everything tasted bland. Season as you cook.
Not Having a Heat Management Strategy
Use those different burners to create temperature zones. If everything’s the same temperature, you’ll be constantly fighting fires—literally and figuratively. Hot zone, medium zone, warming zone. That’s the setup.
Frequently Asked Questions
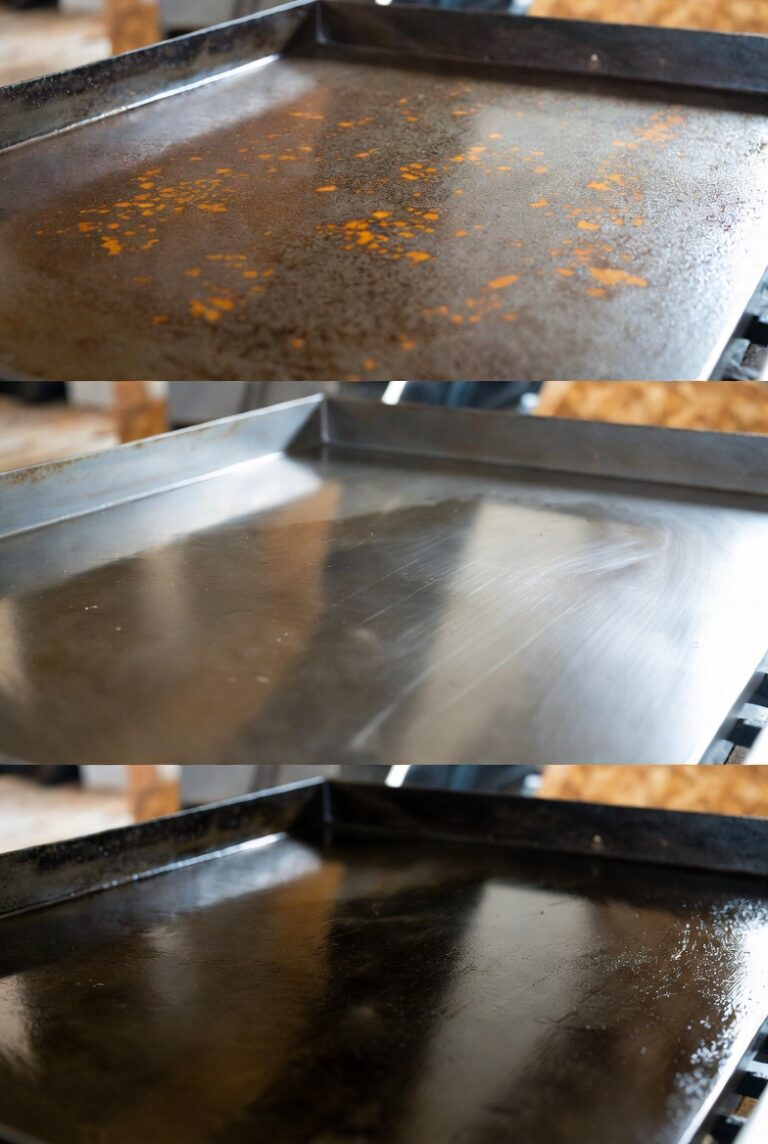
Do I need to season my Blackstone before cooking?
Yes, but that’s a different process. Before your first cook, you need to season the griddle top with oil to create a non-stick surface. If you’re reading this and haven’t done that yet, there are tons of guides out there. But once it’s seasoned, you just need to clean it after each use and occasionally re-season it. For this breakfast recipe, assuming your griddle is already seasoned, you’re good to go.
What if I don’t have bacon grease?
Just use butter or oil. The bacon grease adds flavor, but it’s not mandatory. I’ve done this breakfast with just butter when we’re out of bacon, and it still turns out great.
Can I use fresh hash browns instead of frozen?
Absolutely. Shred some potatoes, squeeze out the excess moisture with paper towels, and cook them the same way. Fresh might take a minute or two longer to crisp up, but they work great.
My eggs keep sticking. What am I doing wrong?
Either your griddle isn’t properly seasoned, you’re not using enough butter, or your heat is too high. Usually it’s the butter. Add more butter than you think you need. Also make sure you’re cooking on medium heat, not high.
How do I keep food warm while cooking everything else?
Use the cooler zones of your griddle. Turn one burner to low or even off, and slide finished food over there. It’ll stay warm without overcooking. This is honestly one of the best features of having such a large cooking surface.
Can I cook the eggs any style besides scrambled?
Definitely. Fried eggs work great on the Blackstone. Sunny side up, over easy, over hard—whatever you want. Just use a good amount of butter and medium heat. I’ve had great luck with over-easy eggs on mine. If you want perfectly round fried eggs, those Blackstone egg rings are awesome for keeping everything contained and looking professional.
What do I do with all the grease after cooking?
Let it cool down a bit, then use your spatulas to push it toward the grease trap. My Blackstone has a rear grease management system with a cup that catches everything. Once it’s cool, I just dump that cup. Super easy.
How long does this whole breakfast take?
From turning on the griddle to plating food, about 25-30 minutes. Ten minutes for preheat, 15-20 minutes for actual cooking. Way faster than cooking inside on multiple pans and your stove.
Why This Recipe Works for Beginners
Look, I’m still a beginner myself. I bought this thing in April and I’m figuring it out as I go. But this recipe works because it teaches you the fundamental Blackstone skills without being overwhelming. You learn heat management, timing, using the full surface, and basic flat-top techniques. Plus, even if you mess something up, bacon and eggs are pretty forgiving. Slightly overcooked bacon? Still delicious. Eggs a little overdone? Add some hot sauce and you’re fine.
The confidence boost from pulling off this breakfast is real. After I nailed this a couple times, I started branching out to other recipes. But I still come back to this classic because it’s just so satisfying and reliable.
Final Thoughts
Here’s the thing about getting into Blackstone cooking—you don’t need to be some expert grillmaster or have years of experience. You just need to jump in and start cooking. This breakfast recipe is the perfect place to start because it’s simple, delicious, and teaches you how your griddle works without stressing you out.
Since getting my Blackstone a few months ago, weekend breakfast has become something I actually look forward to instead of dreading. Sierra gets to sleep in a bit while I’m outside with Bronco and Gunner, cooking up a feast and actually enjoying the process. There’s something really satisfying about cooking on a flat top that I never got from our regular stove.
The beauty of this breakfast is that once you’ve got it down, you can start customizing. Add some sautéed peppers and onions. Throw some sausage on there instead of bacon. Make it a breakfast burrito situation with tortillas. The possibilities are endless, but you gotta start with the basics.
My advice? Pick a weekend morning, grab these ingredients, and just go for it. Don’t overthink it. The Blackstone is honestly way more forgiving than you’d think, and even your mistakes will probably taste pretty good. And hey, if all else fails, the dogs will definitely clean up any errors.
Give this recipe a shot and let me know how it goes. I’m still learning new stuff every time I fire up the griddle, and that’s part of what makes it fun. Now get out there and make some breakfast. Your backyard is calling, and trust me, once you start cooking on a Blackstone, your kitchen stove is gonna feel real lonely.