Blackstone Fried Rice Recipe (Easy & Restaurant-Quality)
Okay, so I’ve made fried rice on my stovetop probably a hundred times over the years, and I thought I had it pretty much figured out. Then I fired up my Blackstone for the first time back in April, and about two weeks in, I decided to try fried rice on it. Holy crap. It’s not even the same food. The amount of surface area you have to work with, the consistent heat, the way you can push things around to different temperature zones—it completely changed what I thought fried rice could be. I’m not exaggerating when I say this is now my go-to meal when I can’t figure out what else to make. It takes maybe 15 minutes once you’ve got everything prepped, it uses up leftover rice and whatever vegetables are hanging out in my fridge, and it tastes like something from an actual restaurant. Sierra asked me last week if I was going to make “that rice thing” again, which is her way of saying she’s actually impressed but doesn’t want to inflate my ego too much.
Blackstone Fried Rice
Ingredients
Method
- Prep all ingredients before cooking — dice onion, mince garlic, beat eggs, measure sauces, break up cold rice into individual grains
- Preheat Blackstone to medium-high heat for 10 minutes until surface reaches 400-425°F
- Add half a tablespoon of oil to one section, pour beaten eggs and scramble until just cooked through — set aside
- Add one tablespoon of oil, cook diced onion for 2 minutes, add peas and carrots for 2-3 minutes, add garlic in the last minute — set aside with eggs
- Add remaining oil to griddle, spread cold rice in an even layer and let sit undisturbed for 1 minute to develop crispy bits
- Flip sections of rice, let sit again 45 seconds, repeat for 4-5 minutes total until rice is golden and toasted
- Push rice together, add eggs and vegetables back in, pour soy sauce, sesame oil, and oyster sauce over everything
- Stir everything together for 2 minutes until sauce is evenly distributed and everything is heated through
- Remove from heat, top with chopped green onions and serve immediately
Notes
- Cold rice is non-negotiable — fresh rice will turn gummy; refrigerate overnight for best results.
- Add sesame oil at the end only — never use it as your cooking oil as it burns at high heat.
- Let the rice sit undisturbed on the griddle to develop those crispy restaurant-quality bits — resist the urge to constantly stir.
Why Blackstone Fried Rice Just Hits Different
The thing about fried rice is that it needs serious heat. Like, way more heat than your home stove can really deliver, especially when you’re cooking for more than just yourself. On my kitchen stove, I’d have to do it in batches, and even then, half the time I’d end up with something closer to steamed rice with soy sauce. Sad, honestly.
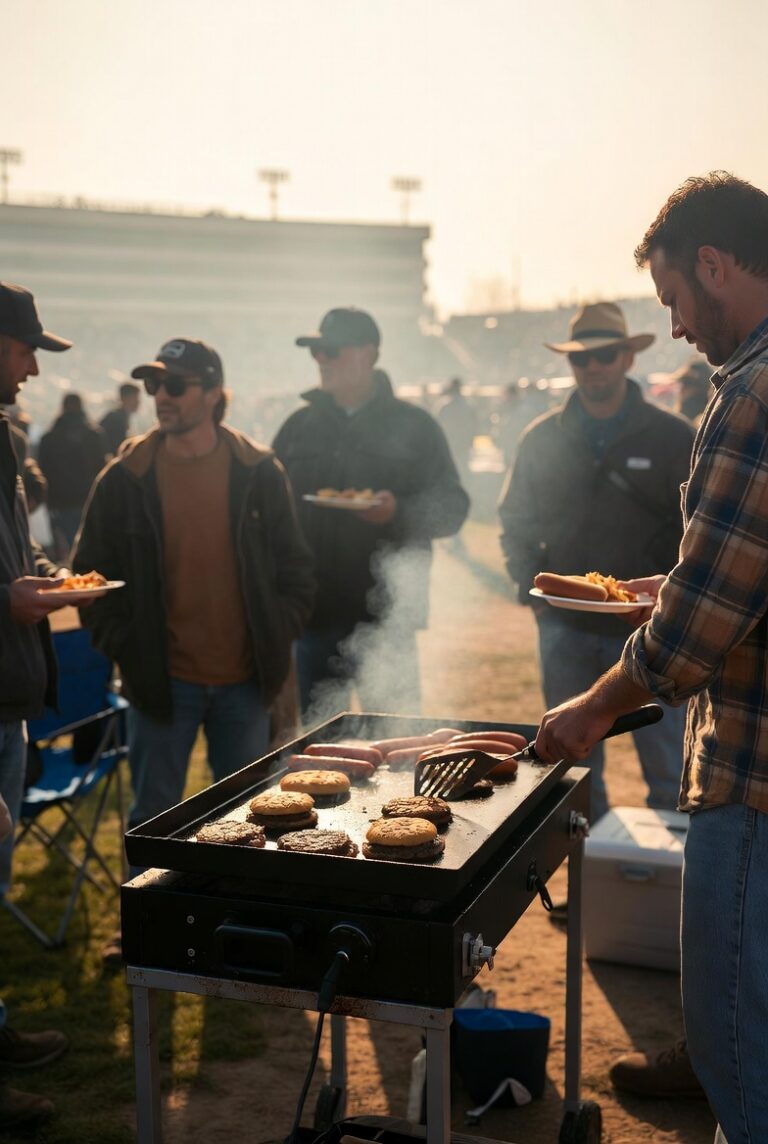
The Blackstone solves this completely. You’ve got 60,000 BTUs of heat spread across 36 inches of flat cooking surface. You can have your rice sizzling on one side, vegetables cooking on another section, and scramble your eggs in a third spot, all at the same time. Then you just push it all together at the end. The first time I did this, I actually laughed out loud at how much easier it was than cramming everything into a wok.
Plus, and this is the part that really got me, you get this incredible char and those crispy bits that you only used to get at restaurants. Turns out that’s not some secret technique—it’s just adequate heat and surface area. Who knew?
Ingredients for Blackstone Fried Rice
This recipe makes enough for about four people as a main dish, or six if you’re serving it as a side. Scale it up or down based on what you need.
The Base
- 4 cups cooked rice, cold (this is crucial—I’ll explain why in a minute)
- 3 tablespoons vegetable oil, divided (not olive oil—it smokes too much at high heat)
- 3 eggs, beaten
- 1 cup diced onion (about one medium onion)
- 1 cup frozen peas and carrots (or fresh if you’re feeling ambitious)
- 3 cloves garlic, minced
- 3 tablespoons soy sauce
- 1 tablespoon sesame oil
- 2 teaspoons oyster sauce (optional but really makes a difference)
- 3 green onions, chopped
- Salt and pepper to taste
Optional Add-Ins
- 1 cup cooked chicken, diced (rotisserie chicken works great)
- 1 cup cooked shrimp
- 1/2 cup diced ham
- A handful of cashews or peanuts
- Fresh ginger, grated (maybe a tablespoon)
- Sriracha or chili oil if you want some heat
The Cold Rice Situation
I’ve got to pause here and talk about the rice because this is the single biggest thing that determines whether your fried rice turns out amazing or becomes a sticky mess.
You need cold rice. Not room temperature, not fresh, not warm. Cold. Like, been-in-the-fridge-overnight cold. When rice is freshly cooked, it’s full of moisture and the grains stick together. When you try to fry fresh rice, you end up with clumps and a texture that’s more like rice pudding than fried rice.
Cold rice has had time to dry out a little. The grains firm up and separate. When this hits the hot griddle, each grain can fry individually, and you get that texture you’re actually looking for.
My routine now is that whenever I make rice for dinner, I make extra and immediately stick the leftovers in the fridge. Two days later, I’ve got perfect fried rice material. You can also spread fresh rice out on a baking sheet and refrigerate it for a few hours if you’re in a pinch, but overnight is really better.
Step-by-Step Instructions
Step 1: Prep Everything First
This moves fast once you start cooking, so you want everything ready to go. Dice your onion, mince your garlic, beat your eggs in a small bowl, measure out your sauces, chop your green onions. If you’re adding protein, make sure that’s cooked and diced. Have it all within arm’s reach of your griddle. I keep my sauces in restaurant squeeze bottles which makes it super easy to add the exact amount I need without fumbling with caps and bottles while everything’s cooking.
Break up your cold rice with your hands or a fork so there aren’t any big clumps. This is important—you don’t want to be trying to break up rice chunks with your spatula while everything else is cooking.
Step 2: Preheat Your Blackstone
Turn all your burners to medium-high and let the griddle preheat for about 10 minutes. You want the surface temperature around 400-425°F. I use a dual probe infrared thermometer to check the temp across different zones, which is honestly a game-changer for knowing when each section is ready and making sure you’re hitting that sweet spot for getting crispy rice without burning anything.
I usually get the griddle going and then do my final prep while it heats up. Bronco and Gunner start losing their minds the second they hear the ignition click, so I’ve got an audience for this whole process.
Step 3: Scramble the Eggs
Add about half a tablespoon of oil to one section of your griddle and let it heat for about 30 seconds. Pour your beaten eggs onto that oiled section and let them sit for just a second, then scramble them with your spatula. You want them just cooked through but still a little soft—they’ll cook more when you mix everything together later.
Once they’re done, scoop them off to the side or into a bowl. Don’t leave them on the griddle or they’ll overcook while you’re doing everything else. This was a mistake I made exactly one time.
Step 4: Cook Your Vegetables
Add another tablespoon of oil to the griddle. Toss on your diced onion and spread it out. Let it cook for about 2 minutes, stirring occasionally. You want it to start getting some color.
Add your peas and carrots (and any other vegetables you’re using) and cook for another 2-3 minutes. Add the garlic in the last minute—garlic burns easily at these temperatures, so it goes in toward the end.
If you’re adding protein like chicken or shrimp, toss it in now just to heat it through. Push everything to one side of the griddle or scoop it into a bowl with the eggs.
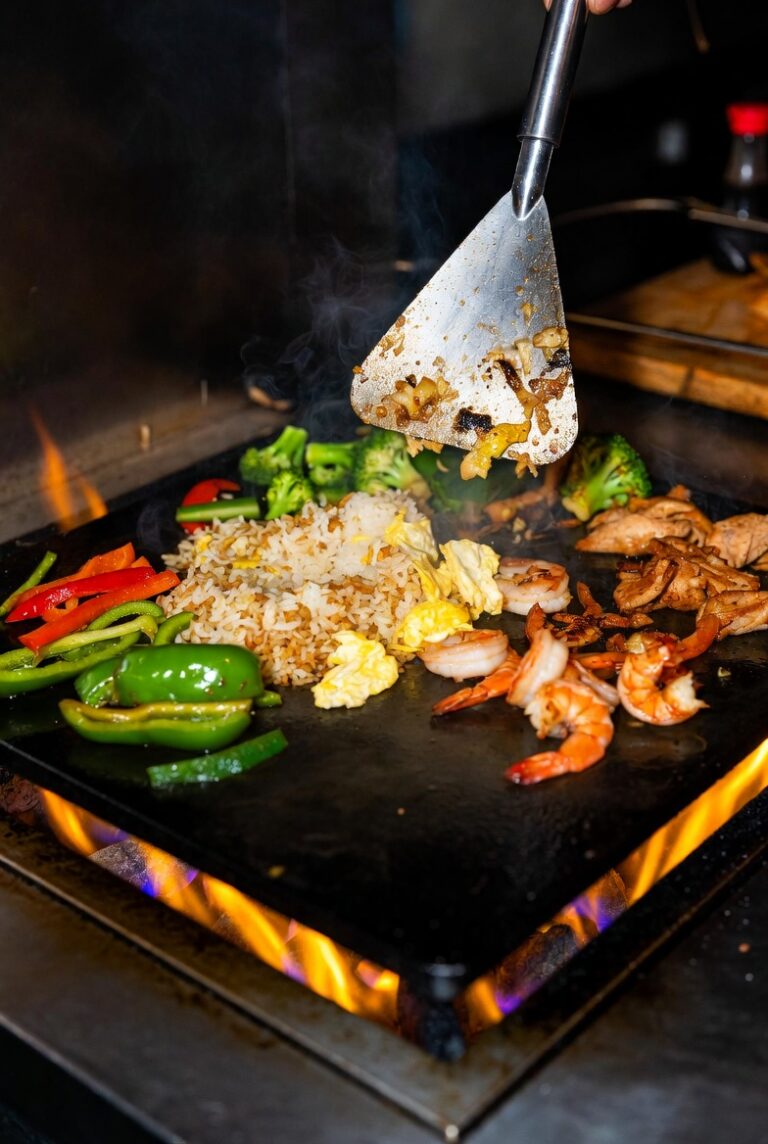
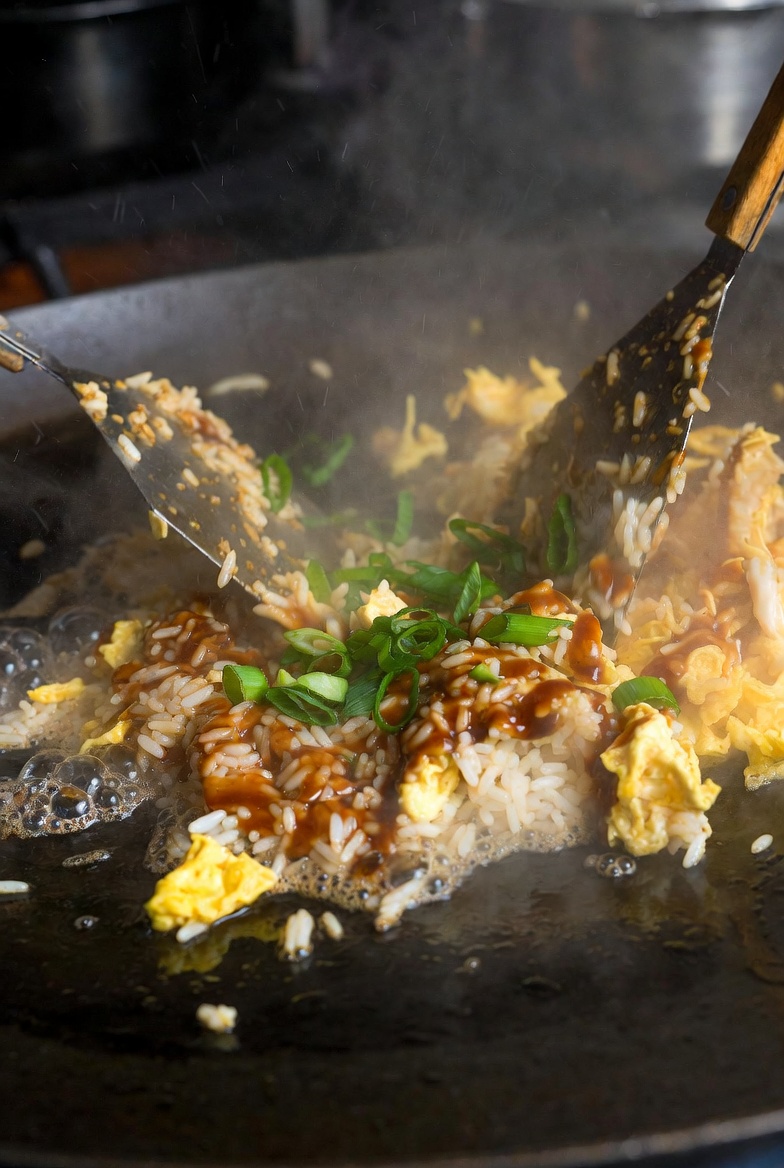
Step 5: Fry the Rice (This Is Where the Magic Happens)
Add the remaining oil to your griddle—you want a nice slick going. Dump all your rice onto the griddle and spread it out into an even layer. And here’s the key: leave it alone for a minute. Just let it sit there. This is how you get those crispy, slightly charred bits that make fried rice actually worth eating.
After about a minute, use your spatula to flip sections of the rice. You should see some golden-brown bits on the bottom. That’s exactly what you want. Keep doing this—let it sit for 45 seconds or so, then flip a section. You’re not constantly stirring it, you’re giving it time to fry and then moving it around.
This takes about 4-5 minutes total. The rice should start to look a little toasted and you should be getting some really nice color on it.
Step 6: Bring It All Together
Once your rice is properly fried, push it all together into one area. Add your eggs and vegetables back in. Pour your soy sauce, sesame oil, and oyster sauce over everything. Now you can stir everything together, mixing it all thoroughly so the sauce coats everything evenly.
Keep it moving for about 2 minutes, letting everything heat through and those sauces work into the rice. Taste it and add salt, pepper, or more soy sauce if you think it needs it.
Kill the heat, toss on your chopped green onions, give it one more stir, and you’re done.
Pro Tips That Actually Matter
Zone cooking is your friend. One thing I figured out pretty quickly is that you don’t need to have all your burners on the same temperature. I usually run the left side a bit cooler than the right. That way I can move things to the cooler side if they’re cooking too fast, or push them to the hot side if I need more heat.
Get the right spatulas. Those long metal spatulas made for griddles are worth every penny. I tried using my kitchen spatula the first time and it was ridiculous. The long griddle spatulas give you way more control and keep your hands farther from the heat.
Don’t overcrowd. Even with 36 inches of space, if you dump too much rice on at once, the temperature drops and you’re steaming instead of frying. This recipe is about the max I’d do at one time. If you’re feeding a crowd, do it in batches.
The sesame oil goes in at the end. I learned this one the hard way. Sesame oil has a low smoke point and it’s really there for flavor, not for cooking. If you use it as your cooking oil, it’ll burn and taste bitter. Add it with the soy sauce at the end.
Day-old rice from Chinese takeout is perfect. Those white containers of white rice you never finish? That’s your fried rice starter kit right there. I actually started ordering extra rice when we get takeout just so I have it ready.
Common Mistakes (That I Definitely Made)
Using fresh rice. I mentioned this already but it bears repeating because it’s the number one way to mess this up. Fresh rice equals gummy fried rice. Just don’t do it. Plan ahead.
Not getting the griddle hot enough. You need high heat for this. If your griddle isn’t hot enough, the rice will stick and steam instead of fry. Wait for it to fully preheat.
Stirring constantly. This isn’t risotto. You want to let the rice sit so it can develop those crispy bits. If you’re constantly moving it around, everything stays soft and you miss out on the best part.
Adding too much sauce. It’s easy to overdo it with the soy sauce, especially if you’re worried about flavor. Start with less than you think you need. You can always add more at the end, but you can’t take it back once it’s in there and your fried rice tastes like a salt lick.
Forgetting to season the griddle beforehand. If your griddle isn’t properly seasoned, rice will stick to it like glue. Make sure you’ve got a good layer of seasoning built up before you try this. I do a quick oil and scrape after every cook to maintain it, and I use avocado oil for my seasoning maintenance since it has a high smoke point and builds up a great non-stick layer over time.
Variations I’ve Tried
The basic recipe above is my go-to, but the whole point of fried rice is that it’s flexible. Here are some variations that worked out really well:
Pineapple fried rice: Add diced pineapple and cashews, use a little less soy sauce and add a splash of rice vinegar. Weirdly good.
Kimchi fried rice: Chop up some kimchi and add it with the vegetables. Cut back on the soy sauce since kimchi is already salty. This one has some serious flavor.
Breakfast fried rice: Use bacon instead of other protein, add more eggs, maybe some diced peppers. It’s basically a breakfast scramble on rice and it works way better than it has any right to.
Curry fried rice: Add a tablespoon of curry powder when you’re frying the rice. Use chicken and add some raisins and cashews. Sierra was skeptical about this one until she tried it.
Frequently Asked Questions
Can I use brown rice instead of white rice?
Yeah, absolutely. Brown rice actually works great for this because it tends to be a bit drier and firmer than white rice anyway. Same rules apply—make sure it’s cold and been refrigerated. It might take an extra minute or two to get the crispy bits going.
What kind of rice is best?
Medium or long grain white rice works best. Jasmine rice is great. I usually just use whatever white rice I have around. Short grain rice can work but it tends to be stickier, so it’s not my first choice.
Do I really need oyster sauce?
No, it’s optional. But it adds this depth of flavor that’s hard to describe. It’s not fishy like you might think—it’s more savory and a little sweet. A bottle costs like four bucks and lasts forever. I’d say it’s worth having around.
Can I make this vegetarian?
Sure. Just skip the oyster sauce (it’s made from oysters, obviously) and any meat. You could add tofu if you want some protein. Press it really well to get the moisture out, then dice it and fry it on the griddle until it gets crispy before you start the rice.
My rice is sticking to the griddle. What am I doing wrong?
Either your griddle isn’t hot enough, you didn’t use enough oil, or your seasoning layer needs work. Make sure you’re fully preheating, use the amount of oil the recipe calls for, and maintain your seasoning between cooks.
How do I reheat leftovers?
Honestly, back on the Blackstone is the best way. Just heat up your griddle to medium, add a tiny bit of oil, and spread the leftover fried rice out. Let it crisp up for a few minutes and it’s basically as good as when you first made it. You can also microwave it but you’ll lose that texture.
Can I prep this ahead of time?
You can definitely prep all your ingredients ahead and keep them in the fridge. The actual cooking needs to happen right before you eat it, but if everything’s chopped and ready to go, the whole cooking process only takes about 15 minutes.
What to Serve With It
This is hearty enough to be a main dish on its own, especially if you load it up with protein. But if you want to make it a fuller meal, here’s what works:
Some kind of grilled protein on the side. While you’ve got the griddle hot anyway, throw on some teriyaki chicken thighs or salmon. Potstickers or dumplings make a great appetizer—I just buy the frozen ones and steam them. A simple cucumber salad with rice vinegar and sesame seeds is a nice fresh contrast to the richness of the fried rice. Spring rolls if you want to go all out.
The other night I made this with some grilled shrimp skewers and it felt like we were at an actual hibachi restaurant. Bronco definitely thought it smelled like one.
Final Thoughts
I’ve been cooking on my Blackstone since April, and fried rice has become the thing I make when I want something that feels impressive but is actually pretty straightforward. The first time you make it, it might feel like you’re juggling a lot of steps, but by the second or third time, it becomes automatic. You’ll develop a rhythm with your griddle and figure out exactly how you like it.
The beauty of this recipe is that it’s basically a template. Once you understand the technique—cold rice, high heat, let it sit to get crispy, don’t oversauce it—you can riff on it however you want. Clean out your fridge, use whatever vegetables you have, throw in leftover chicken from last night’s dinner. It all works.
And look, I know I’m still figuring this whole griddle thing out, but fried rice is one of those recipes where the Blackstone just makes you look like you know what you’re doing, even if you’re kind of winging it. The heat and the surface area do half the work for you. You just have to not mess it up.
Start with this basic recipe, get comfortable with the technique, and then start experimenting. Pretty soon you’ll be that person who always volunteers to bring fried rice to the cookout because you know it’s going to be the best thing there. Trust me on this one.