Blackstone Tailgating Ideas: Recipes & Setup Guide
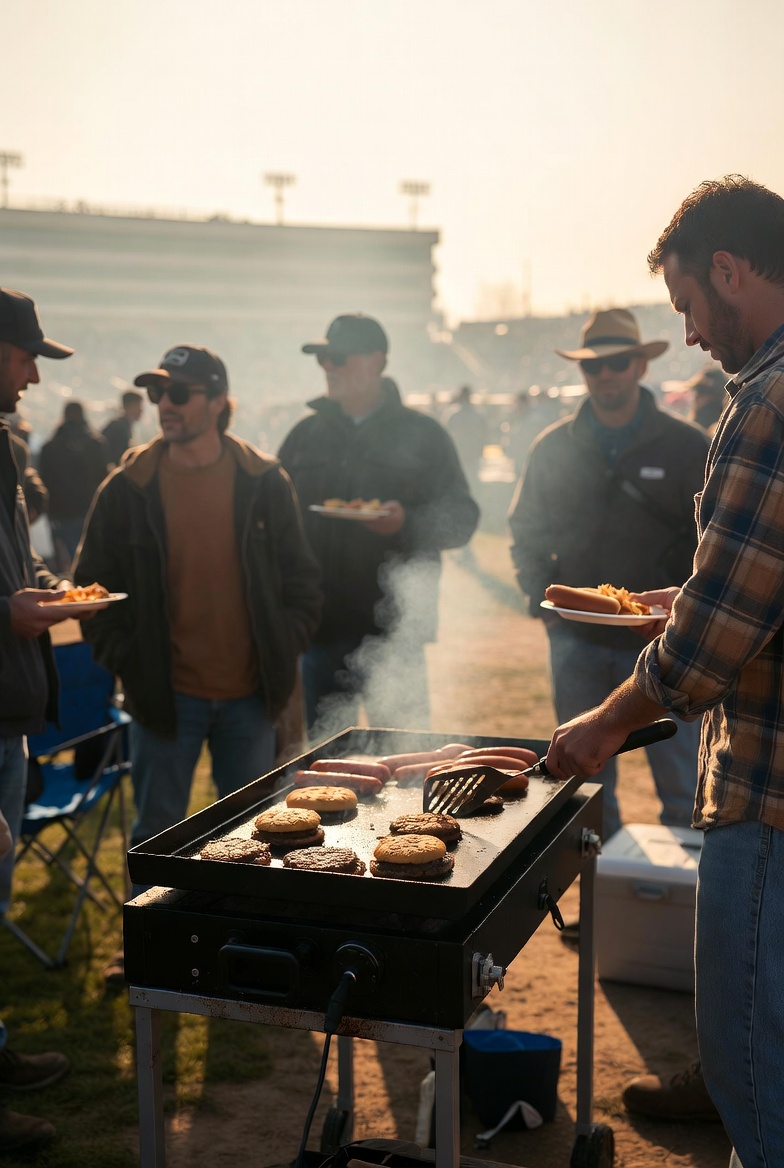
Look, I’ve only had my 36-inch Blackstone since April, and it lives permanently in my backyard in East Hampton. But ever since I got obsessed with this thing, I’ve been thinking about how perfect it would be for tailgating. I see people in parking lots with their sad little portable grills, and I’m like… you could be doing SO much more. A Blackstone at a tailgate is basically a cheat code. You’ve got a massive flat cooking surface, everything cooks at once, and you become the hero of the parking lot. I’ve been eyeing the 22-inch On The Go RV Ready Package specifically for this, and I’ve done enough research to know exactly how I’d approach it. So here’s everything I’ve figured out about taking a Blackstone tailgating, even though mine hasn’t left the backyard yet.
Why a Blackstone Makes Sense for Tailgating
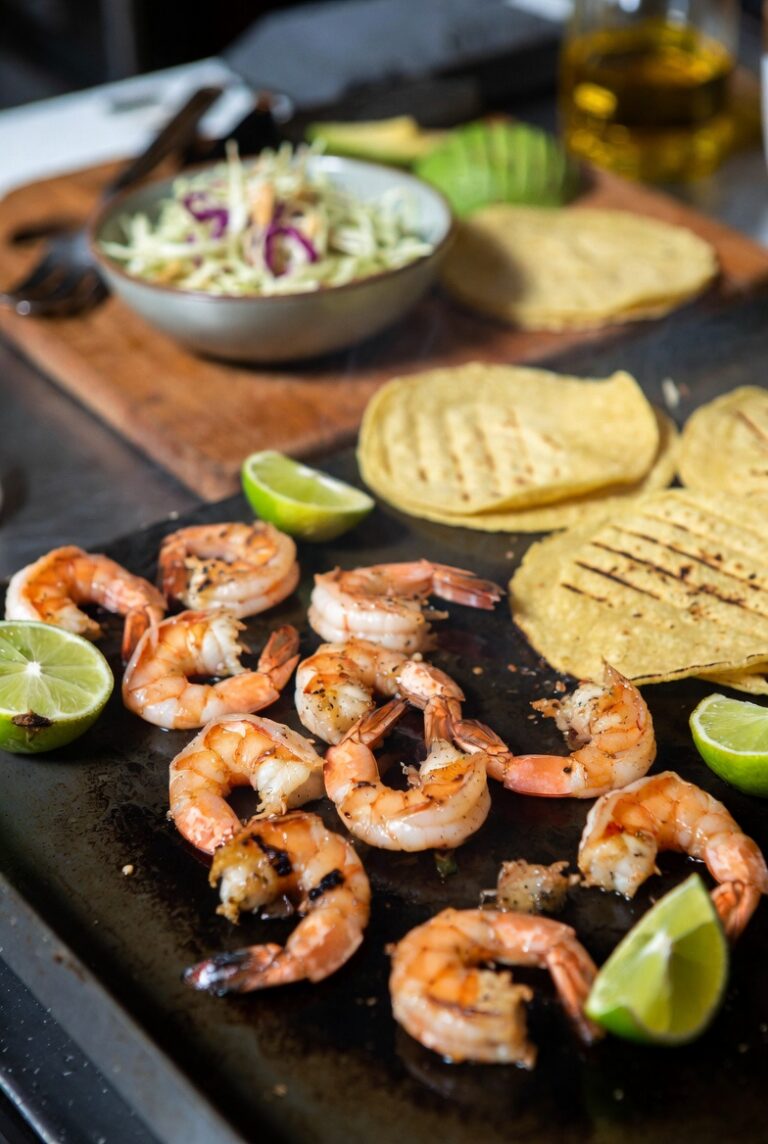
Here’s the thing about tailgating: you’re usually feeding a group, everyone’s hungry at the same time, and you want to actually enjoy the pre-game instead of babysitting individual burgers on a tiny grill. A Blackstone solves all of that. You can cook 12 smash burgers simultaneously. You can do eggs, bacon, and pancakes for those early games. You can make quesadillas, cheesesteaks, hibachi-style chicken and rice, breakfast burritos… the list goes on.
The flat top design means nothing falls through grates into the flames. No flare-ups from dripping fat. Just consistent, controllable heat across a big surface. Plus, there’s something about cooking on a Blackstone that draws people over. It’s like street food energy. People want to watch, they want to hang out, they want to be near where the food’s happening.
Choosing Your Tailgating Setup
For tailgating, you’re looking at portable models. The 22-inch tabletop Blackstone is what I’ve got my eye on. It’s got 330 square inches of cooking space, runs on those small 1-pound propane bottles (though you can get an adapter for a full-size tank), and the whole thing weighs about 50 pounds with the lid. It fits on a standard tailgate or folding table.
There’s also the 17-inch model if you’re cooking for fewer people, but honestly, I’d rather have the extra space. You can always use less of the griddle, but you can’t magically make it bigger when eight people suddenly want smash burgers.
The Best Blackstone Tailgate Menu Ideas
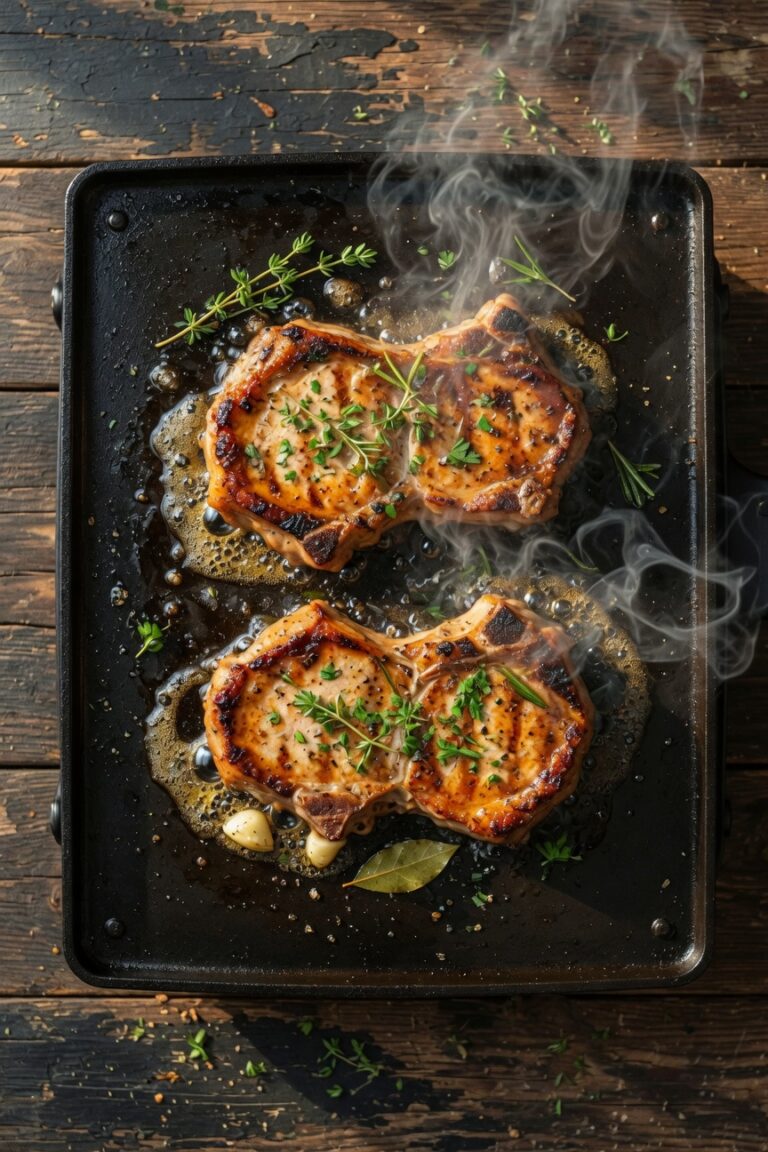
Smash Burgers (The Tailgate MVP)
This is what I’d cook first. Smash burgers on a Blackstone are legitimately better than what most restaurants serve, and they’re stupid simple. A cast iron smash burger press makes the job even easier if you want perfectly uniform patties with maximum crust.
Ingredients (for 8 burgers)
- 2 pounds ground beef (80/20 blend, don’t go leaner)
- 8 burger buns
- 8 slices American cheese (yes, American, trust me on this)
- Salt and pepper
- Butter for toasting buns
- Toppings: shredded lettuce, sliced tomatoes, pickles, diced onions
- Condiments: mayo, ketchup, mustard
Instructions
- Heat your griddle to medium-high, around 400-425°F. You want it hot enough that water droplets dance across the surface.
- Divide your beef into 4-ounce balls. Don’t pack them tight, just loosely form them.
- Oil the griddle lightly with a high-smoke-point oil.
- Place a beef ball on the griddle and immediately smash it flat with a sturdy spatula. I mean FLAT. Use parchment paper under the spatula if you’re worried about sticking.
- Season aggressively with salt and pepper. The seasoning doesn’t go in the meat, it goes ON the meat.
- Let it cook for about 2 minutes without touching it. You’re building a crust.
- Flip once, add cheese immediately, and cook another 1-2 minutes.
- While the second side cooks, butter your buns and toast them on a cooler zone of the griddle.
- Assemble and try not to eat all of them yourself before your friends get any.
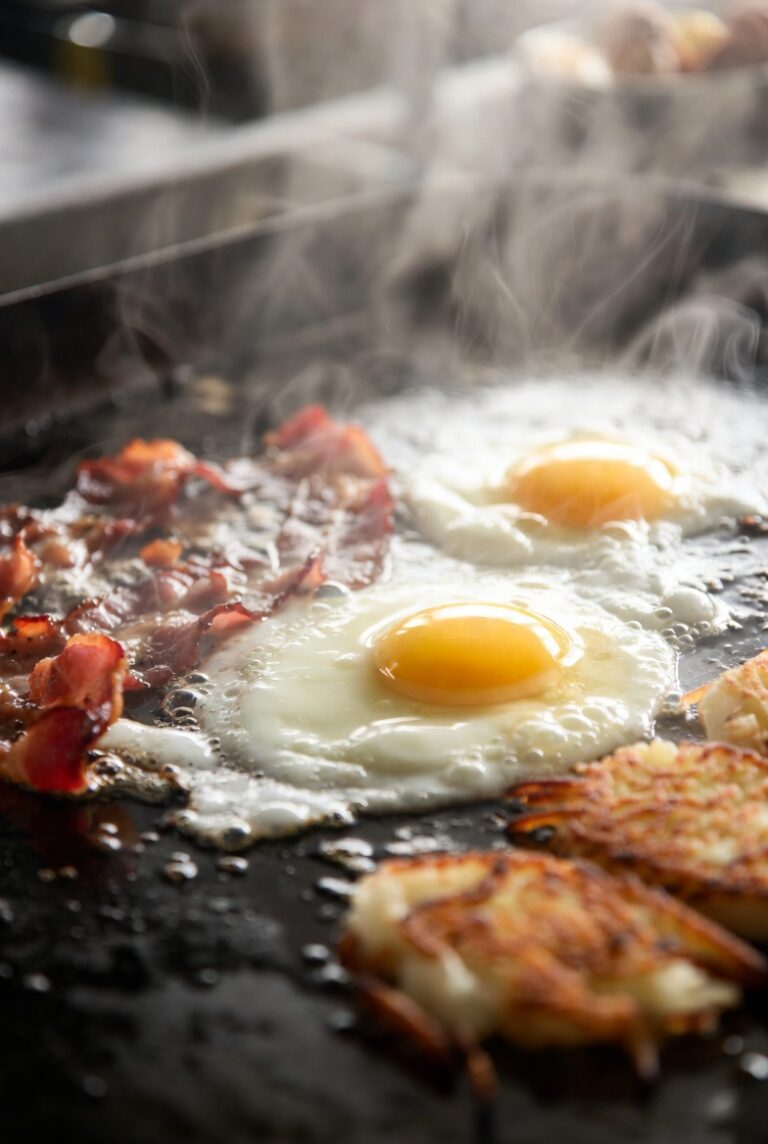
Breakfast Burritos for Early Games
For those 10am kickoffs, breakfast burritos are the move. You can prep everything at home, transport it in coolers, and then it’s just assembly-line cooking.
Ingredients (for 8 large burritos)
- 1 pound breakfast sausage
- 12 eggs
- 2 cups shredded cheddar cheese
- 1 bag frozen hash browns (the shredded kind)
- 8 large flour tortillas
- Salsa and sour cream
- Salt and pepper
- Butter or oil
Instructions
- Heat griddle to medium, around 350°F.
- Cook the breakfast sausage on one zone, breaking it up as it cooks. Takes about 8-10 minutes.
- On another zone, add a bit of oil and cook the hash browns. Spread them thin and let them get crispy. Don’t stir them constantly, let them actually brown. About 10 minutes.
- Crack eggs into a bowl, whisk them with a splash of water, salt, and pepper.
- Clear a space on the griddle, add butter, and scramble the eggs. Keep them moving so they stay soft.
- Warm the tortillas on the griddle for about 30 seconds per side.
- Assemble burritos: tortilla, eggs, sausage, hash browns, cheese, salsa.
- You can wrap these in foil and they’ll stay warm for a while, which is clutch.
Cheesesteak Station
This one’s interactive and fun. Set up all your ingredients and let people customize.
Ingredients (for 8 sandwiches)
- 3 pounds ribeye or sirloin, thinly sliced (ask your butcher to slice it, or partially freeze it and slice at home)
- 3 large onions, sliced
- 3 bell peppers, sliced
- 8 hoagie rolls
- Provolone or Cheez Whiz (I’m not judging either choice)
- Oil for cooking
- Salt and pepper
Instructions
- Heat griddle to medium-high, 375-400°F.
- Start with the onions and peppers. Add oil, spread them out, and let them cook down. This takes about 15 minutes. You want them soft and starting to caramelize.
- Push veggies to the side or into a pan.
- Add more oil and cook the beef in batches. Don’t overload the griddle or it’ll steam instead of sear.
- Season the beef as it cooks. When it’s done, chop it up with your spatulas.
- Mix beef with onions and peppers, pile it into portions.
- Top each portion with cheese and let it melt.
- Toast the rolls on the griddle and scoop the cheesesteak mixture into them.
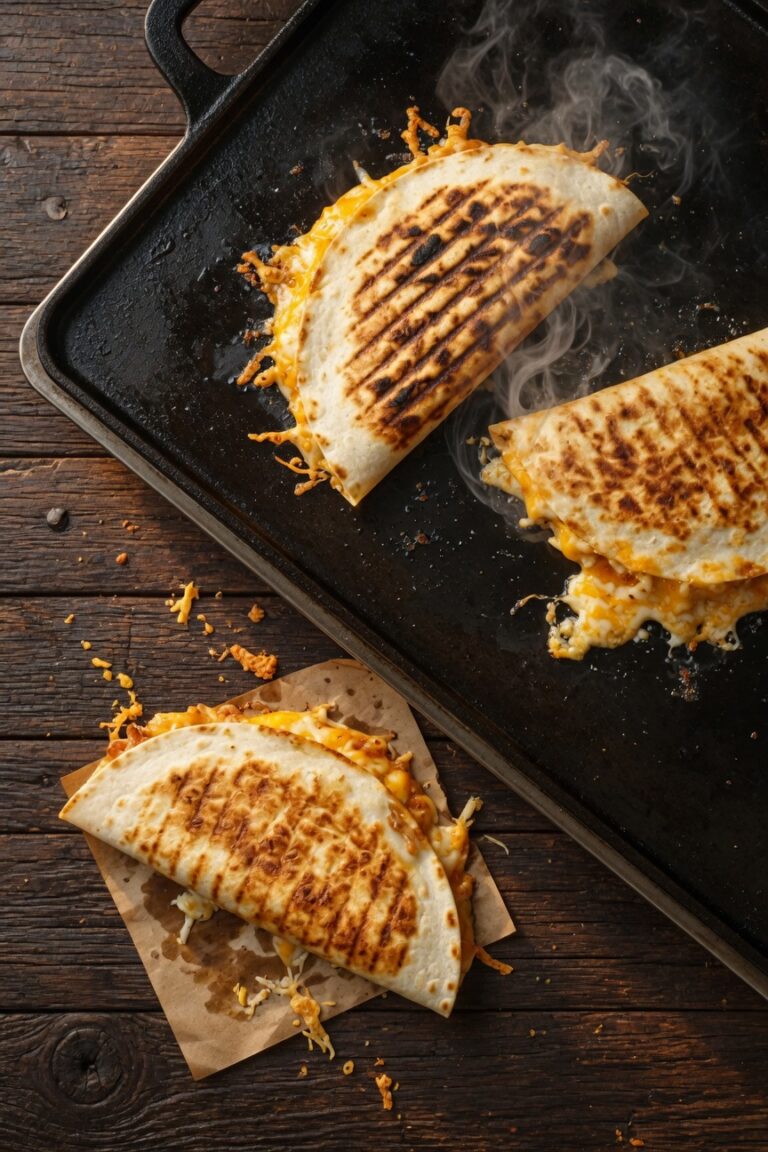
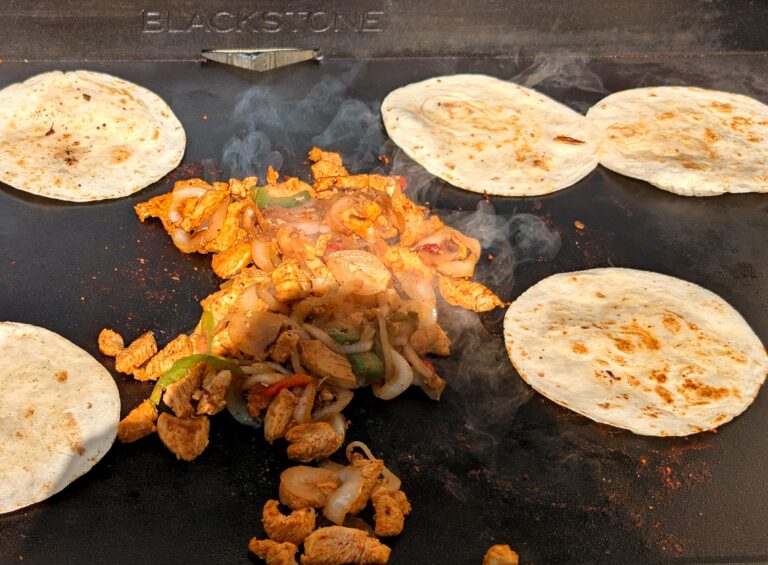
Chicken Quesadillas
Easy, fast, and everyone likes them.
Ingredients (for 8 quesadillas)
- 2 pounds chicken breast, diced small
- 16 flour tortillas
- 4 cups shredded Mexican cheese blend
- 1 can black beans, drained
- 1 cup corn (frozen is fine)
- Taco seasoning
- Oil for cooking
- Salsa, sour cream, guacamole for serving
Instructions
- Heat griddle to medium, 350°F.
- Cook the diced chicken with taco seasoning until done, about 8-10 minutes. Set aside.
- Wipe the griddle and reduce heat to medium-low, around 300°F.
- Place a tortilla down, add cheese, chicken, beans, corn, more cheese, and top with another tortilla.
- Cook until the bottom tortilla is golden and the cheese starts melting, about 2-3 minutes.
- Flip carefully and cook another 2 minutes.
- Cut into quarters and serve with all the fixings.
Pro Tips for Tailgate Blackstone Cooking
Since I’ve been obsessing over making this happen, here’s what I’ve learned from research and what I know from using my big griddle at home:
Prep everything at home. Dice your onions, slice your meat, whisk your eggs, shred your cheese. Put everything in labeled containers or bags. You don’t want to be chopping vegetables in a parking lot.
Bring way more propane than you think you need. Those small 1-pound bottles don’t last as long as you’d think when you’re cooking for a crowd. I’d bring at least four for a full tailgate session. Better yet, get the adapter hose and use a full-size propane tank.
Pack a good tool kit. You need at least two sturdy metal spatulas, tongs, a set of squeeze bottles with water and oil (for temperature control, cleaning, and easy application), paper towels, and a scraper. Don’t forget aluminum pans for holding cooked food.
Set up heat zones. Even on a smaller griddle, you can have different temperature zones. Hot zone for searing, medium for cooking through, low for keeping things warm. Learn where your burners create these zones. A dual probe infrared thermometer is perfect for checking surface temps in different spots so you know exactly where your zones are.
Bring a griddle cover or lid. This helps with melting cheese, cooking thicker items through, and keeping wind from messing with your temperatures. Some portable Blackstones come with a lid, which is clutch.
Plan your cooking order. Start with stuff that can sit and stay warm (like smash burgers wrapped in foil). Cook eggs last because they’re best fresh. Think through the timing.
The first cook seasons the griddle. If you’re using a brand new Blackstone for tailgating, you need to season it first at home. You can’t properly season a griddle in a parking lot. Do this before game day.
Common Mistakes to Avoid
Not checking parking lot rules. Some stadiums or venues have restrictions on propane or open flame cooking. Check ahead so you’re not that guy packing everything back up.
Setting up in a bad spot. You need a stable, level surface. A wobbly table or uneven ground is asking for trouble. Bring a level if you’re serious about this.
Forgetting wind protection. Wind kills griddle performance. It messes with your burners and blows heat away. Set up with your vehicle blocking the wind, or bring a pop-up canopy.
Overcrowding the griddle. Just like at home, give your food room. Overcrowding drops the temperature and makes everything steam instead of sear.
Not bringing enough oil. You’ll use more than you think. Bring a whole bottle. I like using a squirt bottle for easy application.
Skipping the post-cook clean. I know you want to rush into the stadium, but spend five minutes cleaning the griddle while it’s still warm. Scrape it, wipe it down, add a thin layer of oil. Future you will be grateful.
Underestimating cook time. Everything takes a little longer when you’re cooking outside in variable conditions. Start earlier than you think you need to.
What to Bring: Complete Tailgate Blackstone Checklist
- Portable Blackstone griddle
- Propane (multiple 1-pound bottles or a full tank with adapter)
- Sturdy table or flat cooking surface
- Two or more metal spatulas
- Tongs
- Scraper tool
- Squirt bottle with water
- Cooking oil in squirt bottle
- Paper towels (multiple rolls)
- Aluminum pans for holding food
- Aluminum foil
- Coolers with ice for ingredients
- All food prep in containers
- Plates, napkins, utensils
- Trash bags
- Hand sanitizer or wipes
- Fire extinguisher (seriously)
- Folding chairs
- Pop-up canopy for shade/wind protection
Frequently Asked Questions
How long does a 1-pound propane bottle last on a Blackstone?
It depends on how many burners you’re running and at what temperature, but generally 1.5 to 2 hours. For a full tailgate where you’re cooking for several hours, bring multiple bottles or use a full-size tank with an adapter hose.
Can you use a Blackstone in light rain?
Technically yes, but it’s not ideal. The moisture affects temperature control and makes everything harder. If there’s weather in the forecast, bring a pop-up canopy. Don’t use it in heavy rain or storms.
Do you need to re-season a griddle between tailgates?
Not fully re-season, but you should maintain the seasoning. After each use, clean it, dry it completely, and add a thin layer of oil. Before your next use, heat it up and add another thin layer. That maintains the non-stick surface.
What’s the best oil for high-heat cooking on a Blackstone?
Avocado oil has the highest smoke point, followed by refined vegetable oil or canola oil. Don’t use olive oil or butter for high-heat searing, they’ll burn and smoke.
How do you transport a griddle that still has seasoning oil on it?
Let it cool completely, then either use the lid that comes with portable models or wrap it in a large garbage bag. The seasoning oil shouldn’t transfer much if it’s been properly applied (thin layer), but the bag protects your car either way.
Can you cook frozen food on a Blackstone at a tailgate?
You can, but it’s not ideal. Frozen food drops the griddle temperature significantly, especially on a smaller portable unit. It’s better to thaw things overnight in a cooler. If you must cook frozen, use lower heat and give it more time.
How many people can you realistically feed with a 22-inch Blackstone?
You can feed a large group, but not all at once. Figure you can cook for 8-10 people comfortably if you’re doing it in waves. The cooking surface can handle maybe 6-8 burgers at once, or a dozen breakfast sausages, or scrambled eggs for the whole group.
What if you’ve never used a Blackstone before game day?
Do NOT make your first cook at a tailgate. Practice at home first. Learn how your griddle heats up, where the hot spots are, how to control temperature. Make the same recipes you plan to cook at the tailgate. There’s a learning curve, and you don’t want to figure it out with a crowd watching.
Final Thoughts
I haven’t actually done this yet, but I’m absolutely going to. Everything I’ve learned from using my big griddle at home tells me that a Blackstone would completely change the tailgate game. The ability to cook restaurant-quality food for a group in a parking lot is legitimately exciting.
The key is treating it like any outdoor cooking situation: prepare obsessively, bring backups of everything, and start cooking earlier than necessary. The actual cooking part is easier than traditional grilling because you’ve got that big flat surface and consistent heat.
If you already have a Blackstone at home and you’ve been wondering if it’s worth getting a portable one for tailgating, I think the answer is absolutely yes. If you’re thinking about getting your first Blackstone specifically for tailgating, just know that you’re committing to being the person everyone expects to feed them. Which honestly sounds pretty great to me.
Now I just need to convince Sierra that we need a second Blackstone. Wish me luck.