Best Blackstone Griddle for Beginners: 2026 Guide
So you’re thinking about getting a Blackstone griddle. Smart move. I picked up my first one back in April, and I’m not exaggerating when I say it’s changed how I cook outside. But here’s the thing – walking into that decision cold can be overwhelming. There are like eight different models, a bunch of size options, and everyone on the internet has a strong opinion about which one is “essential.”
I’m going to walk you through what actually matters when you’re starting out, which model makes the most sense for most people, and how to avoid dropping money on features you won’t use. This isn’t coming from someone who’s been griddle-cooking for years. I’m figuring this out right alongside you, just a few months ahead.
Why the Right First Griddle Actually Matters
Here’s what I didn’t understand before I bought mine: the griddle you start with sets your entire learning curve. Go too small and you’ll immediately feel limited. Go too big and the thing becomes intimidating to heat, season, and clean. Pick something with a bunch of bells and whistles you don’t understand yet, and you’re just paying for confusion.
The best beginner griddle is the one that lets you focus on learning the actual cooking instead of wrestling with the equipment. You want something forgiving, straightforward, and sized right for how you’ll actually use it in the first few months.
The Best Blackstone Griddle for Beginners in 2026
After researching this pretty heavily before my purchase and then actually using one, my pick for beginners is the Blackstone 28-inch griddle with hood. Not the massive 36-inch (though that’s what I have), not the tiny 17-inch, and not the tabletop 22-inch. The 28-inch hits a sweet spot that’s hard to argue with.
Why the 28-Inch Works
The cooking surface gives you 524 square inches. That’s enough space to cook for a family of four or five without feeling cramped, but it’s not so much real estate that you’re standing there waiting forever for it to heat up or using a ridiculous amount of propane on a Tuesday night when you’re just making burgers.
It’s got two independent burners, which is huge. You can run one side hot for searing and keep the other side at a lower temp for toast or keeping things warm. That two-zone control is where the learning really happens, and you need at least two burners to make it work.
The hood is clutch. Yeah, you can buy griddles without hoods and save a few bucks, but you’ll miss it the first time you want to melt cheese or steam some vegetables. It also gives you a place to trap heat when you’re trying to cook chicken through without burning the outside.
What About the 36-Inch?
Look, I have the 36-inch. It’s incredible. But if I’m being honest? It’s a lot of griddle to learn on. It’s got four burners, 720 square inches of cooking surface, and when you’re still figuring out temperature control and seasoning, that much space can work against you.
The 36-inch makes sense if you know you’ll be cooking for crowds regularly, like big family gatherings or parties. But for most people starting out, it’s overkill. You’ll spend more on propane, more time on maintenance, and more energy second-guessing yourself because there’s so much space to manage.
I went big because I had a feeling I’d use it that way. And I do. But I also totally understand why someone would be happier learning on something more manageable first.
Why Not the Smaller Models?
The 22-inch tabletop is awesome for portability. I’ve been eyeing one for tailgating situations. But as your main griddle? You’ll outgrow it fast. It’s only got one burner, so you don’t get that temperature zone flexibility. And the cooking space is tight if you’re making breakfast for more than two people.
The 17-inch is really just for camping or taking to the beach. It’s not a daily driver.
Key Features to Look for as a Beginner
When you’re evaluating any Blackstone as your first griddle, here’s what actually matters:
Independent Burners
You need at least two burners with separate controls. This is non-negotiable. Being able to create different heat zones is fundamental to griddle cooking. You’re not just cooking everything at one temperature like a regular grill.
A Hood
The hood isn’t optional in my opinion. It turns your griddle into something way more versatile. You can steam, melt, and trap heat when you need to cook something through. Models without hoods are cheaper, but you’ll wish you had one.
Grease Management System
All Blackstone griddles have a rear grease trap, but make sure yours has a decent collection system. You’re going to be dealing with grease, especially when you’re learning and maybe using too much oil. A good trap makes cleanup so much easier.
Solid Cart with Shelves
Get a model with a proper cart. The shelves underneath are where you’ll stash your spatulas, oil, paper towels, and all the stuff you need within reach. Griddle cooking moves fast. You don’t want to be running back inside for a bottle of water or a clean towel.
Push-Button Ignition
Most Blackstone models have this now, but make sure yours does. Standing there clicking a lighter while propane flows is not how you want to start your cooking experience.
What You Don’t Need Yet
Blackstone makes some models with air fryer attachments, side burners, and all kinds of add-ons. As a beginner, skip all that. You’re not going to use the side burner as much as you think, and the air fryer attachment is solving a problem you don’t have yet.
Start simple. Learn the flat top. Get comfortable with temperature control and seasoning. If you decide six months in that you need extra features, you can always upgrade or add accessories.
Complete Beginner Setup: What to Buy with Your Griddle
The griddle itself is just the start. Here’s what you actually need to get cooking right away:
Essential Accessories
- Two large spatulas: Get the Blackstone brand ones or something similar with a good wide blade. You need at least two.
- Squeeze bottles: One for water, one for oil. This is how you’ll control both while cooking.
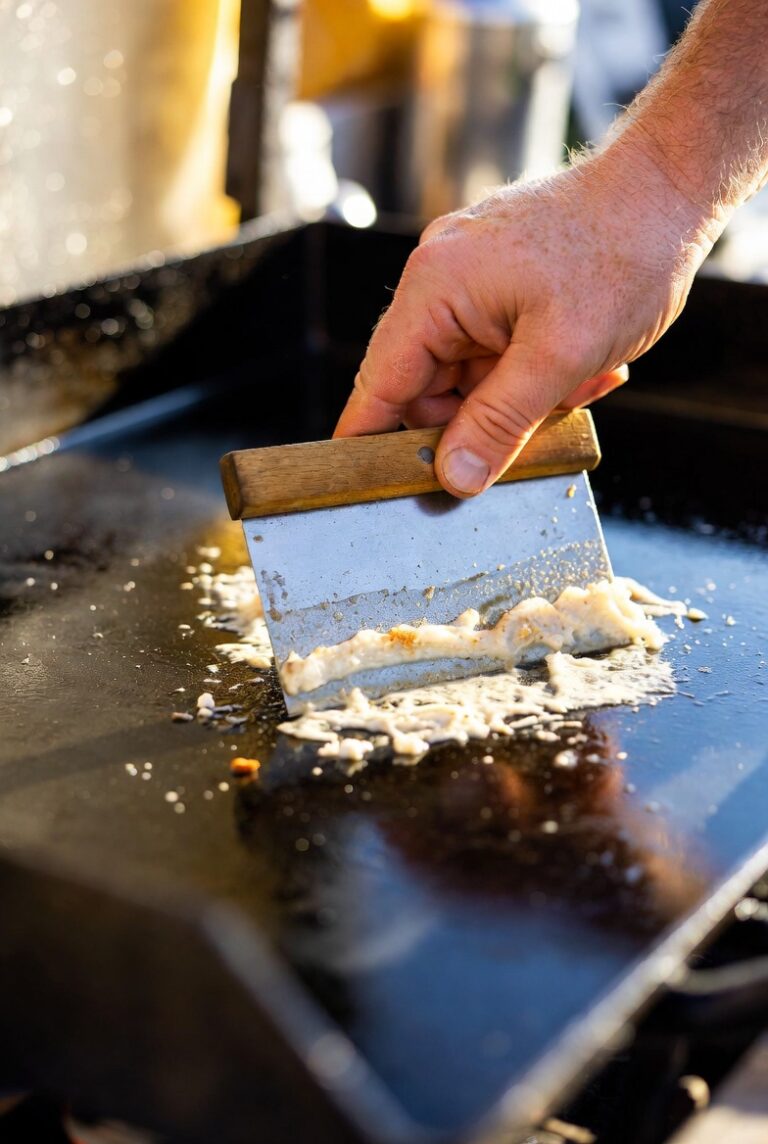
- Scraper: For cleaning while the griddle is hot. Non-negotiable.
- Paper towels: You’ll go through a ton of these, especially during seasoning.
- High-smoke-point oil: I use avocado oil. Others swear by canola or vegetable oil. Whatever you pick, make sure it has a smoke point above 400 degrees.
- Cover: Protect your investment. A good cover keeps rain and crud off your griddle between uses.
Nice to Have but Not Urgent
- Basting dome (good for melting cheese faster)
- Egg rings (if you want perfect round eggs)
- Chopper/scraper combo tool
- Griddle thermometer (though you’ll learn to judge by hand)
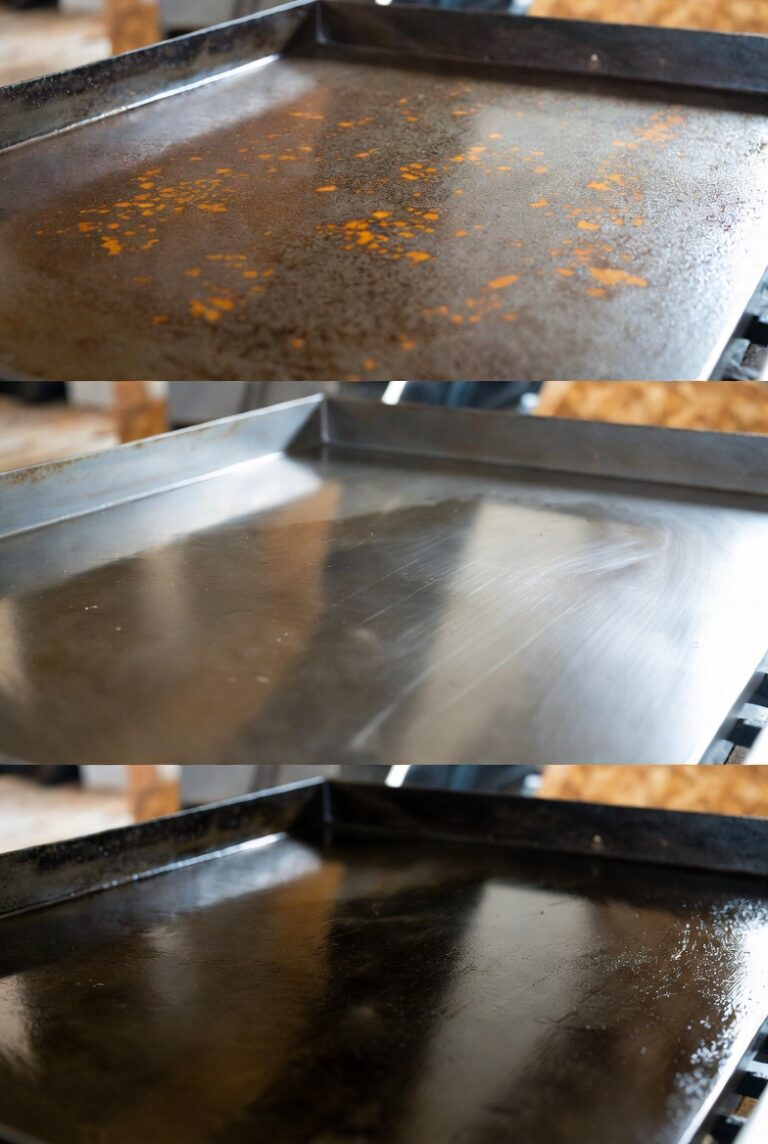
First-Time Setup: Seasoning Your Griddle
This is the part that scares people, but it’s actually pretty straightforward. Your griddle arrives with a protective coating that you need to remove, then you need to build up a seasoning layer. Here’s how:
Initial Cleaning
- Turn all burners to high and let the griddle heat for 15-20 minutes. This burns off the protective coating.
- Turn off the heat and let it cool enough to touch.
- Wipe down the entire surface with paper towels and a little dish soap to remove any residue.
- Rinse with water and dry completely.
Seasoning Process
- Turn burners to high heat again.
- Once the griddle is hot, spread a thin layer of high-smoke-point oil across the entire surface. I mean thin – like a teaspoon spread over each section.
- Let it smoke. The oil will start smoking pretty quickly. That’s good. That’s the polymerization happening.
- Once the smoking stops and the oil looks dry, you’ve completed one layer.
- Repeat this process 3-4 times minimum. More is better.
- After your final layer, turn off the heat and let everything cool.
The griddle won’t look perfectly black and gorgeous after the first seasoning. That’s fine. It builds up over time with use. Don’t stress about making it perfect right away. Grabbing some Blackstone griddle seasoning conditioner can help speed up the process and give you better initial results.
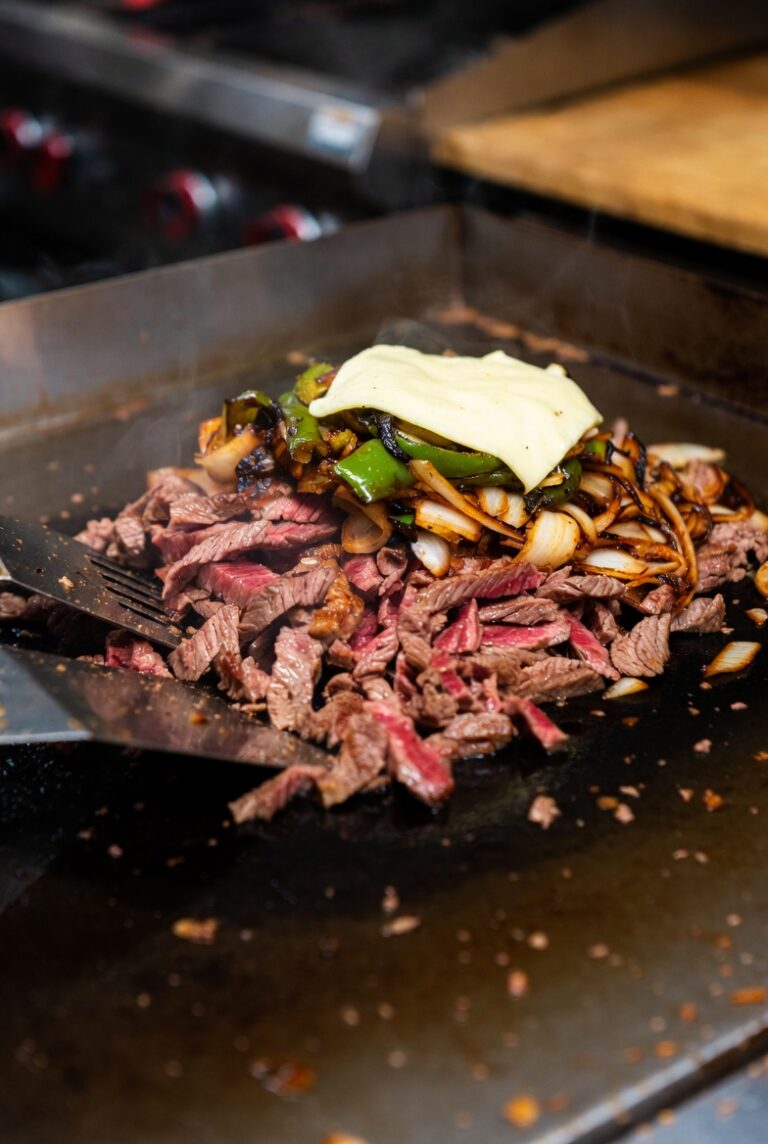
Your First Cook: Simple Smash Burgers
Once your griddle is seasoned, start with something simple. Smash burgers are perfect because they’re hard to mess up and they teach you the basics of heat control and timing.
For your first cook, I’d start with smash burgers — here’s my full guide on how to make them:
Blackstone Smash Burgers Recipe
Pro Tips for Beginners
Use less oil than you think: One of the most common beginner mistakes is drowning the griddle in oil. You need way less than it seems. A thin coating is plenty.
Let it preheat properly: Give the griddle a solid 10 minutes to come to temperature. Rushing this means uneven cooking.
Don’t crank everything to high: Medium to medium-high handles most cooking. High heat is really just for searing or when you need a fast blast of heat.
Clean while it’s hot: Right after cooking, while the griddle is still warm, scrape off any stuck bits and wipe it down. This is way easier than cleaning a cold griddle.
Re-season lightly after each use: Before you shut down, add a thin layer of oil and spread it around. This maintains your seasoning and prevents rust.
Keep your tools on the griddle cart: Seriously, have everything within arm’s reach. Griddle cooking moves fast and you don’t want to leave food sitting while you search for a spatula.
Common Beginner Mistakes
Going Too Hot Too Fast
The first time most people fire up a griddle, they crank everything to max. Then their food burns on the outside and stays raw inside. Start at medium heat and adjust from there. You can always add more heat.
Not Using Water
Water is a tool on a griddle. Squirt some on the surface to help scrape off stuck bits, to create steam for melting cheese, or to cool down a zone that’s gotten too hot. Keep that squeeze bottle handy.
Skipping the Pre-Season
Some people are so excited they try to cook on an unseasoned griddle. Don’t do this. You’ll end up with food stuck everywhere and a rusty mess. Take the hour to season it properly first.
Using the Wrong Oil
Olive oil and butter are great for finishing, but they burn at griddle temperatures. Use something with a high smoke point for your main cooking – avocado, canola, vegetable, or grapeseed oil.
Overcrowding the Surface
Just because you have space doesn’t mean you should fill every inch. Leave room to maneuver. You need space to flip things, move them to cooler zones, and work without everything running into each other.
Forgetting About Temperature Zones
If you have multiple burners, use them differently. One side hotter for searing, one side cooler for finishing or keeping things warm. This is the whole advantage of a griddle over a single-zone cooktop.
Maintaining Your Griddle
Taking care of a Blackstone is simpler than people make it sound, but you do need to stay on top of a few things:
After Every Cook
- Scrape the surface while it’s still warm
- Wipe with paper towels to remove food particles
- Add a thin layer of oil and spread it around
- Let it cool, then cover it
Deep Cleaning (Every Few Weeks)
- Heat the griddle to medium
- Pour water on the surface and use your scraper to work off any buildup
- Wipe clean with paper towels
- Re-season with 1-2 coats of oil
If you want to make this process even easier, consider picking up a griddle cleaning kit that includes a grill stone and scraper specifically designed for deep cleaning sessions.
Long-Term Storage
- Clean thoroughly
- Apply a generous coat of oil
- Cover with a quality cover
- If storing for months, consider bringing it inside or under a covered area
Frequently Asked Questions
Do I need a 36-inch griddle or is 28-inch enough?
For most people starting out, 28 inches is plenty. It handles family meals and small gatherings without being overwhelming to heat, clean, or maintain. The 36-inch is great if you know you’ll regularly cook for large groups, but it’s not necessary for learning.
Can I use a Blackstone griddle in winter?
Yes, they work in cold weather, though they’ll take longer to preheat and use more propane. Just make sure to clear snow off the cover and give it extra time to come to temperature.
How long does seasoning really take?
Initial seasoning takes about an hour if you do 4 layers. But the real seasoning develops over weeks and months of cooking. Don’t stress about making it perfect on day one.
What if my griddle gets rusty?
Surface rust happens, especially if moisture gets to the griddle. Scrape it off with your scraper or a grill stone, wipe clean, and re-season. It’s not a big deal.
Can I cook breakfast and dinner on the same day?
Absolutely. Just clean between uses. Scrape, wipe, and you’re good to go. The flavors don’t really transfer if you clean properly between cooks.
How much propane does a Blackstone use?
A standard 20-pound propane tank will last somewhere between 10-15 hours of cooking, depending on how high you run the burners. For normal use, you’re looking at weeks or even months per tank.
Should I buy a tabletop or cart model?
For your first griddle, get a cart model. The stability, storage, and ease of use make learning so much better. Tabletop models are great for portability, but not as your main setup.
What’s the best first meal to cook?
Smash burgers or pancakes. Both are forgiving, teach you heat control, and taste amazing off a griddle. Start simple and build your confidence.
The Bottom Line
If you’re new to Blackstone griddles, the 28-inch model with a hood is your best starting point. It’s big enough to be useful, small enough to not intimidate you, and priced right for someone who’s still figuring out if griddle cooking is going to become a regular thing.
Could you start with a 36-inch? Sure. Could you make a 22-inch work? Maybe. But the 28-inch hits that sweet spot where you’re not giving up anything important and you’re not paying for more griddle than you’ll use while you’re learning.
Get the griddle, season it properly, start with simple recipes, and just cook. You’ll figure out pretty quickly what works and what doesn’t. The learning curve isn’t steep – it’s more like a gentle hill. Within a few cooking sessions you’ll feel comfortable, and within a few weeks you’ll wonder why you didn’t get one sooner.
The hardest part is just making the decision and getting started. After that, it’s all just really good food and figuring out what to cook next.