Blackstone Griddle for RV Camping: Setup & Cooking Guide
If you’re into RV camping and you haven’t thought about bringing a Blackstone griddle along for the ride, you’re missing out on one of the best cooking setups you could possibly have out there. I picked up my first Blackstone back in April, and within about two weeks I was already planning how to get one for camping trips. There’s something about cooking on a flat-top griddle in the great outdoors that just makes sense. You’ve got tons of cooking space, everything cooks evenly, cleanup is straightforward, and honestly, you look like you know what you’re doing even if you’re still figuring things out. For RV camping specifically, a Blackstone solves a bunch of problems at once. You’re not crowding around a tiny RV stove, you’re not dealing with campfire inconsistency, and you can actually cook for a group without losing your mind.
Classic Campsite Breakfast on Your Blackstone
Ingredients
Method
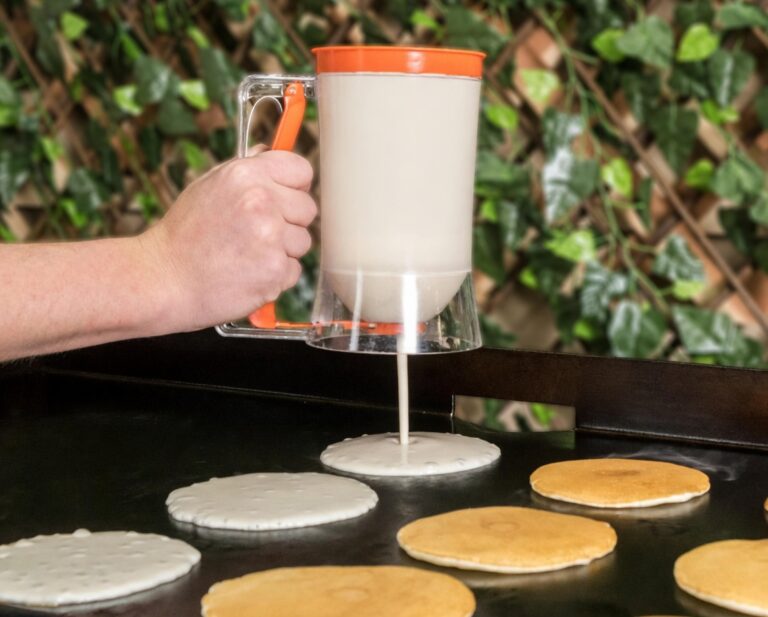
- Fire up your Blackstone and let it preheat for about 10 minutes. You want medium heat across most of the surface, around 350-375°F. If you have a temp gun, use it. If not, the water drop test works. A drop of water should sizzle and evaporate in a few seconds, not instantly vaporize and not just sit there.
- While the griddle is heating, get your ingredients prepped and ready to go. Crack your eggs into a bowl if you're scrambling them, or keep them in the carton if you're frying. Have your bacon laid out and ready. If you're shredding fresh potatoes, get that done and squeeze out as much moisture as you can with paper towels or a clean kitchen towel.
- Once the griddle is hot, lay your bacon strips across one section of the griddle. Don't overlap them. Let them cook for about 3-4 minutes, then flip. You want them to render out their fat and get crispy but not burnt. This usually takes 8-10 minutes total depending on thickness.
- While the bacon is going, add a little butter or oil to another section and spread out your hash browns in an even layer about half an inch thick. Don't mess with them constantly. Let them sit and develop a crust. After about 5 minutes, flip them in sections. Season with salt and pepper. They need another 4-5 minutes on the second side.
- Once your bacon is done, move it to the coolest part of the griddle to stay warm, or pull it off entirely onto a plate. Lower the heat slightly under where the bacon was cooking, around 300-325°F.
- Now for the eggs. If you're scrambling, pour your beaten eggs onto the cleaned section where the bacon was. Use a spatula to keep them moving, scraping and folding. They'll cook fast, just 2-3 minutes. Pull them off while they're still slightly wet. They'll finish cooking from residual heat. If you're frying eggs, crack them directly onto the griddle. They'll take about 3-4 minutes for over-easy, a bit less if you want them sunny-side up.
- Check your hash browns. They should be golden brown and crispy. If you're adding cheese, sprinkle it on now and let it melt for 30 seconds.
- Everything should be done around the same time. Plate it up, let people hit it with hot sauce or ketchup, and you've just fed your whole camp a legit breakfast without breaking a sweat.
Notes
- Preheat the griddle for a full 10 minutes for even cooking temperature
- Create different heat zones on the griddle - hot for searing, medium for cooking, cool for keeping food warm
- Don't overcrowd the cooking surface - leave space between items for proper cooking
- Squeeze out moisture from fresh shredded potatoes with paper towels for crispier hash browns
- Pull scrambled eggs off while still slightly wet as they'll continue cooking from residual heat
The thing is, not every Blackstone is right for RV life, and there are some real considerations about propane, storage, setup, and what actually makes sense when you’re on the road. I’ve been looking hard at adding a portable model to my setup specifically for this, so I’ve done a ton of research on what works and what doesn’t. Let me walk you through everything you need to know about using a Blackstone griddle for RV camping.
Why a Blackstone Griddle is Perfect for RV Camping
First, let’s talk about why this even makes sense. RV kitchens are cramped. You’ve usually got two burners if you’re lucky, maybe a small oven that heats the whole rig up to about a thousand degrees, and counter space that disappears the second you set down a cutting board. Cooking anything more complicated than coffee becomes a logistical puzzle.
A Blackstone changes all that. You take the cooking outside where you’ve got room to work, fresh air, and an actual social setup where people can hang around while you cook instead of everyone crammed inside a hot RV. The flat cooking surface means you can do breakfast for six people all at once. Pancakes, eggs, bacon, hash browns, all going at the same time on different heat zones. Try that on two burner grates.
The other huge advantage is how these things run on standard propane. Most RVs already have propane on board, and while you probably won’t be plumbing your Blackstone directly into your RV’s propane system unless you’re really committed, you’re already setup to carry and refill the one-pound bottles or 20-pound tanks you need. You’re not adding a completely new fuel source to your camping setup.
Choosing the Right Blackstone Model for Your RV
This is where you need to think practically. I’ve got a 36-inch model at home, and it’s absolutely perfect for my backyard. But that thing is not what you want to haul around in an RV. It’s big, it’s heavy, and it takes up serious space.
For RV camping, you’re looking at the 22-inch tabletop griddle or the 17-inch model. The 22-inch is the sweet spot for most people. It’s big enough to actually cook a real meal for 4-6 people, but it’s portable enough to move around and store without taking over your entire RV storage bay. The 22 inch RV Ready Package comes with a carry bag and folds down, which is clutch for RV storage. You can tuck it into an outside compartment, and it’s not so heavy that moving it around becomes a whole production. Weight matters when you’re loading and unloading at every stop.
Propane Considerations
The portable Blackstone models run on one-pound propane bottles, the green Coleman-style ones you see everywhere. The 22-inch can also connect to a 20-pound tank with an adapter hose, which makes way more sense for RV camping. Those little one-pound bottles run out fast, they’re more expensive per BTU, and you end up with a pile of empties to deal with.
Get yourself a proper adapter hose. They’re like fifteen bucks and they let you run your griddle off the same 20-pound tanks you’re probably already using for your RV setup or a regular grill. You’ll get way more cook time, and you’re not constantly swapping bottles in the middle of making breakfast.
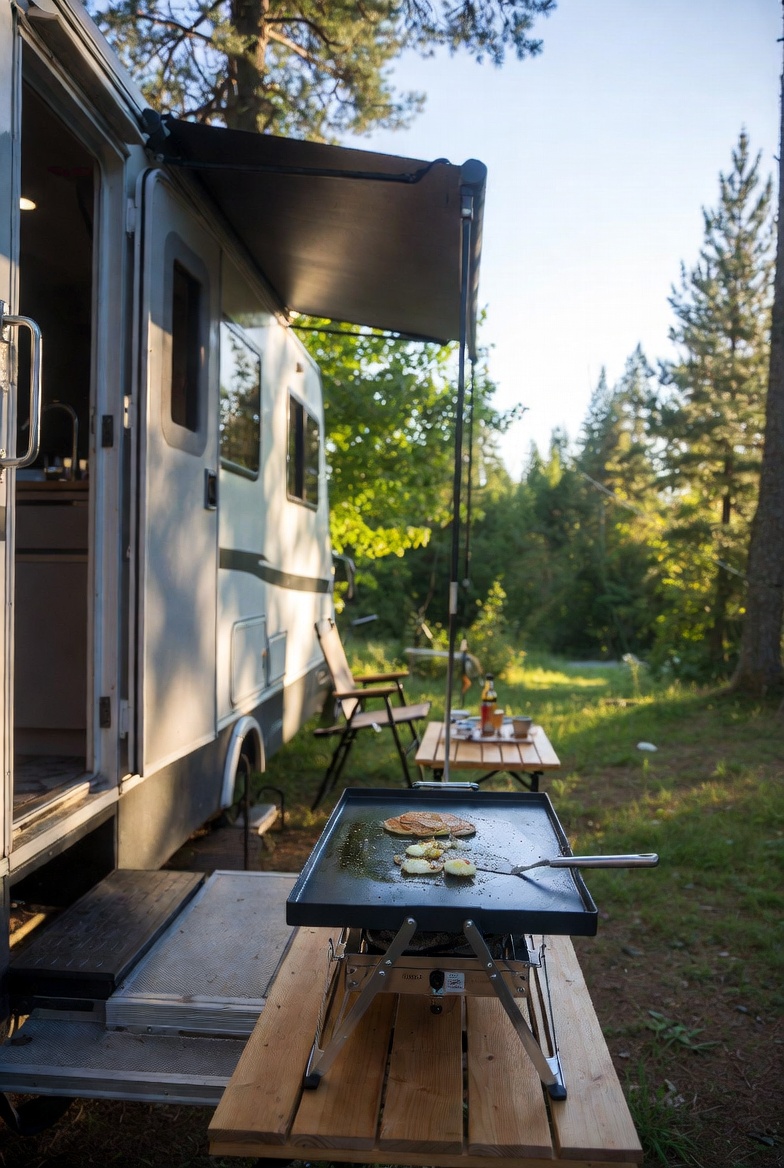
Setting Up Your Blackstone at the Campsite
Setup is straightforward, but there are some things to think about that might not be obvious at first.
You need a stable, level surface. A picnic table works great if it’s sturdy. Some people use a collapsible tabletop stand, which gives you more control over height and stability. Just make sure whatever you’re setting up on can handle the weight and won’t tip or wobble. You don’t want your griddle sliding around when you’re flipping food.
Give yourself clearance above and around the griddle. You’re dealing with open flames underneath and serious heat on top. Don’t set up under an RV awning or low-hanging branches. Keep it away from the side of your RV. Give yourself at least a few feet of clearance in every direction.
Wind is a real factor outdoors. If it’s gusty, your griddle will lose heat fast and your propane consumption goes up. Position yourself to block the wind if you can, or use your RV or vehicle as a windbreak. Some people bring a small windscreen, which can help a lot on breezy days.
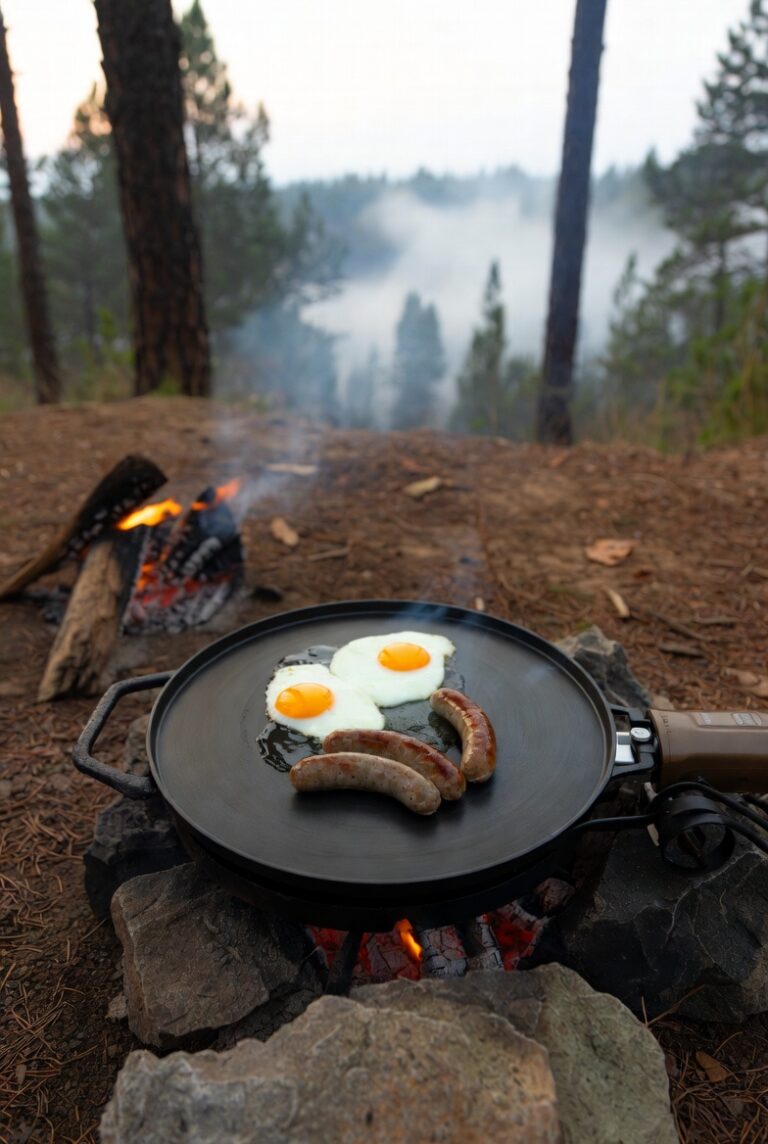
What to Cook on Your Blackstone While RV Camping
The beauty of a griddle for camping is you can cook the same stuff you make at home, but you can also lean into classic camping meals that actually work way better on a flat-top than over a campfire or on a grate.
Breakfast Spread
This is where the Blackstone really shines for camping. You can do a full breakfast for your whole crew at once. Bacon goes on first, pushed to a cooler zone once it’s done. Eggs next, scrambled or fried. Hash browns get their own section. Pancakes if you’re feeling ambitious. French toast. Everything stays warm, everything finishes around the same time, and everyone eats together instead of in shifts.
Burgers and Dogs
Obviously. But on a griddle they’re better. Burgers get that perfect crust, you can toast the buns right on the surface, and you can caramelize onions alongside everything else. Way better than trying to balance everything on a grate where half your toppings fall into the fire.
Stir-Fry and Fajitas
High heat, lots of surface area, everything moving around. A Blackstone handles stir-fry better than most home stoves. Fajitas are the same deal. Get your veggies and meat going, warm your tortillas right on the griddle, and you’ve got a campsite meal that feels way more elevated than hot dogs for the fourth night in a row.
Grilled Cheese and Quesadillas
Perfect for lunch or a quick dinner. You can crank out six grilled cheese sandwiches at the same time, all perfectly golden. Quesadillas get crispy and perfect. Kids love this stuff, and it’s easy enough that you’re not sweating over the griddle for an hour.
Smash Burgers
If you know, you know. Smash burgers need high heat and a flat surface to get that crispy, lacey crust. A Blackstone is basically purpose-built for these. Bring some good ground beef, keep it cold until you’re ready to cook, and smash them hard onto a screaming hot griddle. Two minutes per side, melted cheese, toasted bun. That’s the move.
Step-by-Step: Classic Campsite Breakfast on Your Blackstone
Let me walk you through a standard camping breakfast that’ll feed four to six people and uses the full potential of your griddle space.
Ingredients
- 1 pound bacon
- 8-12 eggs
- 1 pound frozen hash browns or 4 large potatoes, shredded
- Salt and pepper
- Butter or oil
- Shredded cheese (optional)
- Hot sauce, ketchup, whatever people want
Instructions
- Fire up your Blackstone and let it preheat for about 10 minutes. You want medium heat across most of the surface, around 350-375°F. If you have a temp gun, use it. If not, the water drop test works. A drop of water should sizzle and evaporate in a few seconds, not instantly vaporize and not just sit there.
- While the griddle is heating, get your ingredients prepped and ready to go. Crack your eggs into a bowl if you’re scrambling them, or keep them in the carton if you’re frying. Have your bacon laid out and ready. If you’re shredding fresh potatoes, get that done and squeeze out as much moisture as you can with paper towels or a clean kitchen towel.
- Once the griddle is hot, lay your bacon strips across one section of the griddle. Don’t overlap them. Let them cook for about 3-4 minutes, then flip. You want them to render out their fat and get crispy but not burnt. This usually takes 8-10 minutes total depending on thickness.
- While the bacon is going, add a little butter or oil to another section and spread out your hash browns in an even layer about half an inch thick. Don’t mess with them constantly. Let them sit and develop a crust. After about 5 minutes, flip them in sections. Season with salt and pepper. They need another 4-5 minutes on the second side.
- Once your bacon is done, move it to the coolest part of the griddle to stay warm, or pull it off entirely onto a plate. Lower the heat slightly under where the bacon was cooking, around 300-325°F.
- Now for the eggs. If you’re scrambling, pour your beaten eggs onto the cleaned section where the bacon was. Use a spatula to keep them moving, scraping and folding. They’ll cook fast, just 2-3 minutes. Pull them off while they’re still slightly wet. They’ll finish cooking from residual heat. If you’re frying eggs, crack them directly onto the griddle. They’ll take about 3-4 minutes for over-easy, a bit less if you want them sunny-side up.
- Check your hash browns. They should be golden brown and crispy. If you’re adding cheese, sprinkle it on now and let it melt for 30 seconds.
- Everything should be done around the same time. Plate it up, let people hit it with hot sauce or ketchup, and you’ve just fed your whole camp a legit breakfast without breaking a sweat.
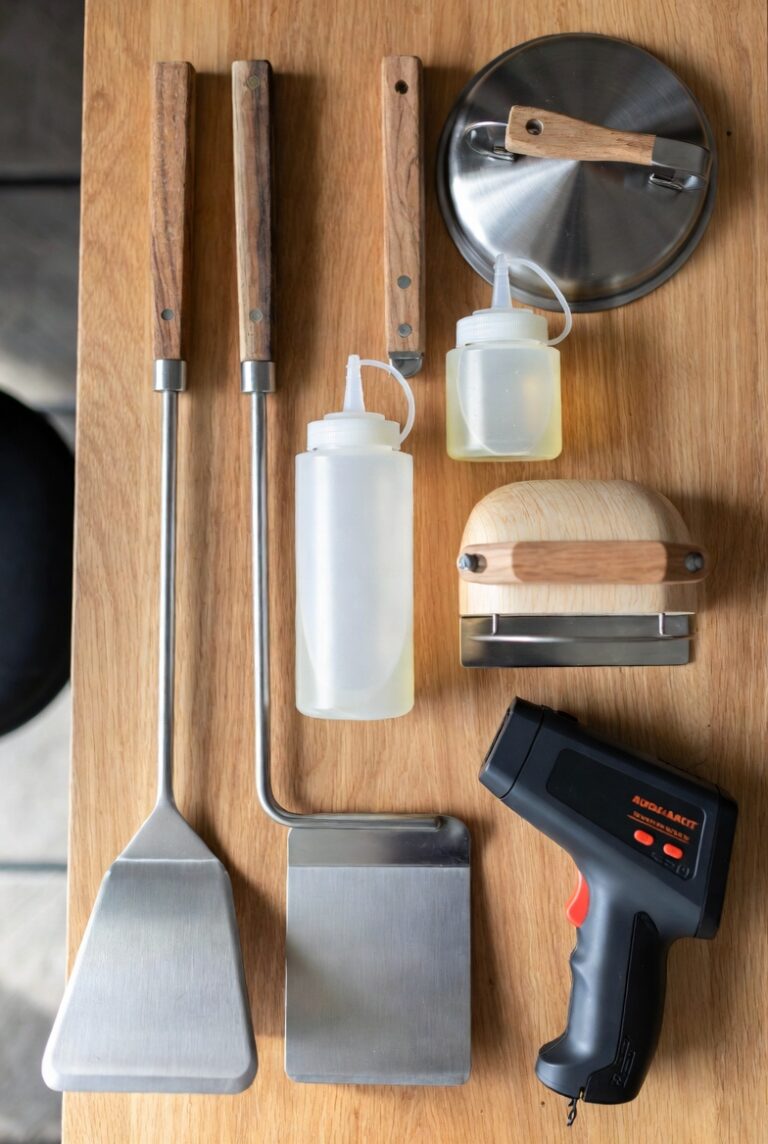
Pro Tips for RV Blackstone Cooking
Bring a good spray bottle of water. It’s useful for steaming things, deglazing the surface, and doing a quick clean between different foods. Just don’t spray so much that you’re dropping the temperature dramatically or creating a huge steam cloud.
Pack your tools in a dedicated bag. Spatulas, scrapers, oil, paper towels, your spray bottle. Keep it all together so you’re not digging through your RV looking for stuff when you’re ready to cook. A convenient griddle caddy organizer can keep everything in one place and within easy reach at your campsite.
Season your griddle before you leave home. Don’t try to do your first full seasoning at a campsite. Get that done in your driveway where you have everything you need and you’re not under pressure to get dinner going. Once it’s properly seasoned, maintenance is easy on the road.
Bring extra propane. You’ll use more than you think, especially if it’s cold or windy. An extra 20-pound tank or a bunch of backup one-pound bottles will save you from having to track down propane in an unfamiliar area.
Use aluminum foil pans under the grease trap. Makes cleanup way easier. When you’re done cooking, just toss the foil and you don’t have to deal with scraping congealed grease out of the trap at a campsite.
Let your griddle cool completely before storing it. This seems obvious, but when you’re breaking camp and trying to get on the road, it’s tempting to pack up while things are still warm. Don’t. Let it cool down fully, do a quick wipe, and then put it away properly.
Common Mistakes to Avoid
One of the most common things people do is not preheating long enough. They fire up the griddle and immediately start throwing food on. The surface needs time to come up to temperature evenly. Give it ten minutes. It makes a huge difference.
Overcrowding the cooking surface is another one. Just because you have all that space doesn’t mean you should fill every inch of it. Food needs room to cook properly. Leave space between items so heat can circulate and you can actually maneuver your spatula.
Not managing your heat zones is a mistake that limits what you can do. You don’t need the entire griddle at the same temperature. Create different zones – one hot section for searing, one medium for general cooking, one cooler area for keeping things warm. That’s how you cook multiple items at once without burning something or undercooking something else.
Cleaning mistakes are common too. Some people try to do a deep clean after every single cook, which is overkill and actually strips your seasoning. Others don’t clean at all and end up with buildup. The right approach is somewhere in between. Scrape while it’s hot, wipe it down with oil, and you’re good. Deep cleaning is for occasional maintenance, not every cook.
Finally, running out of propane mid-cook because you didn’t check your tank level before starting. Learn from other people’s frustration. Check your propane before you fire up, especially if you’re at a campsite where getting a refill might mean a drive into town.
Cleaning and Maintenance on the Road
Keeping your griddle in good shape while camping is actually easier than you might think. You’re not dealing with built-up grime from months of cooking. You’re doing basic maintenance after each use.
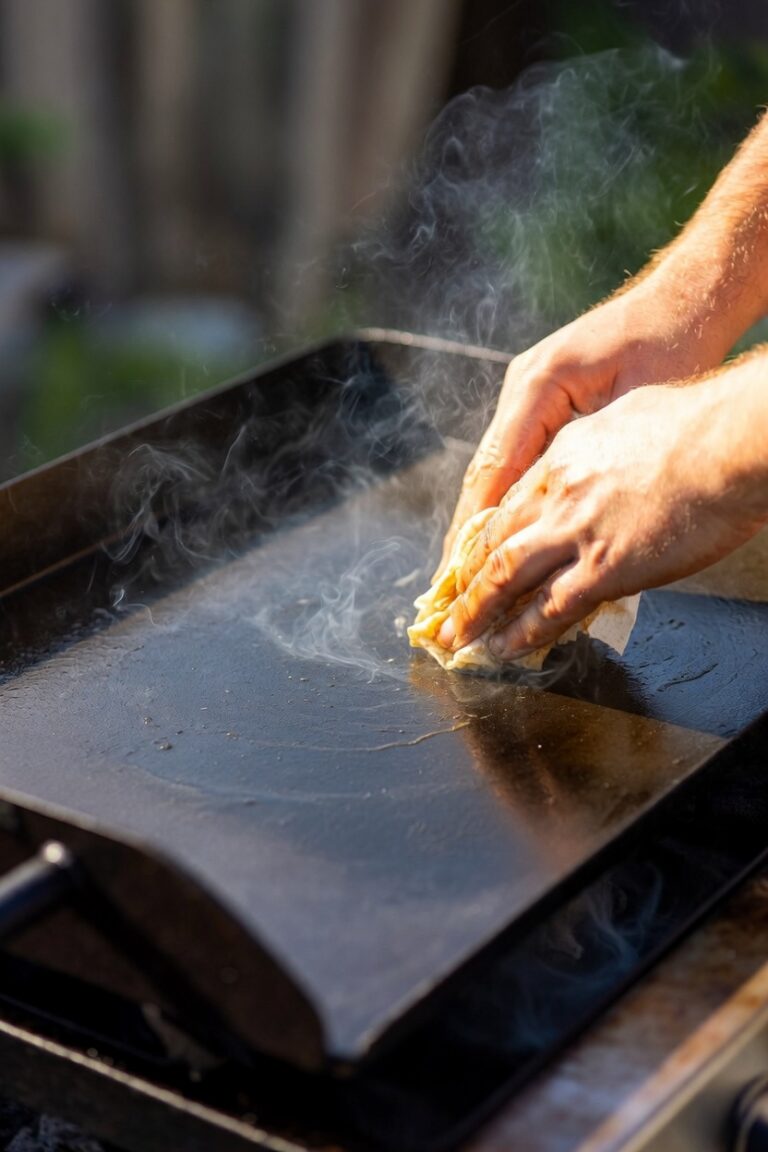
While the griddle is still hot after cooking, scrape off any stuck-on food with your metal scraper. Get all the bits pushed into the grease trap. If there’s stubborn stuff, hit it with a little water from your spray bottle and scrape again while it steams.
Once it’s scraped clean, pour a small amount of cooking oil on the surface while it’s still warm. Use a paper towel or cloth to spread it around in a thin layer. This protects the surface and maintains your seasoning. That’s it. That’s your basic after-cook maintenance.
For storage between camping trips, make sure the surface is completely dry and has a light coat of oil. If you’re storing it for a while, some people put a thin towel over the cooking surface to absorb any moisture and prevent rust. The cover that comes with the Adventure Ready models works great for this.
Frequently Asked Questions
Can I use my Blackstone griddle inside my RV?
No. Don’t even think about it. These griddles produce carbon monoxide and need serious ventilation. They’re outdoor cooking equipment only. Even cooking under an RV awning is sketchy. Keep it outside in open air.
How much propane does a Blackstone use while camping?
A 22-inch griddle on medium heat will go through a one-pound bottle in about an hour to an hour and a half of actual cook time. A 20-pound tank will last you many meals, probably a whole weekend of regular cooking. Cold weather and wind increase consumption.
What if I don’t have my griddle seasoned yet?
Season it at home before your trip. Seriously. Trying to do a proper initial seasoning at a campsite is a hassle. You need multiple thin layers of oil heated to smoking point, and it takes a couple hours. Do it in your driveway or backyard before you leave.
Can I cook in the rain?
You can, but it’s not ideal. The griddle will work fine, but you’re going to be standing in the rain, and moisture in the air can affect how things cook. If you have a covered area that’s open on the sides for ventilation, that works. Just never use it in an enclosed space.
Is the 17-inch model big enough for a family?
It depends on your family size and what you’re cooking. For two adults and a small kid, probably fine. For four or more people, you’ll feel cramped. The 22-inch is a better choice if you’re regularly cooking for more than two or three people.
Do I need to bring special tools?
You need good metal spatulas, a scraper, oil, and paper towels or cloths. A spray bottle for water is really helpful. That’s about it. Don’t overcomplicate it. The spatulas that come with most Blackstone models are actually pretty decent to start with.
Can I hook my Blackstone directly to my RV’s propane system?
Technically yes, but it requires the right adapters and fittings, and you need to know what you’re doing. Most people just run it off a separate 20-pound tank with an adapter hose. That’s simpler and safer if you’re not experienced with propane systems.
Final Thoughts
A Blackstone griddle makes a ton of sense for RV camping. You get restaurant-quality cooking setup in the great outdoors, with enough space to feed everyone at once and way more capability than the little stove inside your rig. The 22-inch portable model hits the sweet spot for most RV campers – big enough to be useful, small enough to actually travel with.
The key is thinking through the practical stuff before you head out. Make sure your griddle is seasoned and ready to go. Get your propane situation sorted out with the right adapters and enough fuel. Pack your tools and supplies in one place so you’re not scrambling at the campsite. And give yourself good setup – stable surface, proper clearance, protected from wind when possible.
Once you’ve got all that dialed in, you’re looking at some of the best meals you’ll have while camping. There’s something great about cooking outside on a flat-top griddle with your camp set up around you, way better food than you’d ever get from a campfire or a cramped RV kitchen. The smell of bacon and hash browns in the morning at a campsite, cooking enough to feed everyone at once, everyone hanging around while you work – that’s what camping food should be.
If you’re already into RV camping and you like to cook, adding a portable Blackstone to your setup is one of those no-brainer upgrades that you’ll wonder how you ever camped without. You’ll use it every trip, and it’ll change how you think about eating on the road. That’s been my take on it from looking at adding this to my camping setup. It just makes too much sense not to do it.