Fix Blackstone Griddle Rust Fast: 30-Minute Guide
Look, I’m not going to sugarcoat this—seeing rust on your Blackstone griddle is a gut punch. You bought this thing to cook amazing food, and now it looks like it belongs in a junkyard. But here’s the good news: rust on a Blackstone is completely fixable, and honestly, it’s way easier than you think. I’m talking like 30 minutes of work and your griddle is back to being a cooking surface you’d be proud to use. The rust doesn’t mean you ruined anything or that your griddle is trash. It just means you need to do a little rehab work, and I’m going to walk you through exactly how to do it.
First thing to understand: griddle tops are bare steel. That’s what makes them awesome for cooking, but it also means they’ll rust if they’re not properly seasoned or if that seasoning layer gets compromised. It’s not a defect. It’s just the nature of the material. So whether you’re dealing with a few small rust spots or the whole surface looks like it spent a month underwater, the fix is the same. You’re going to remove the rust, re-season the surface, and get back to cooking. Let’s do this.
What You’ll Need to Fix Rust on Your Blackstone
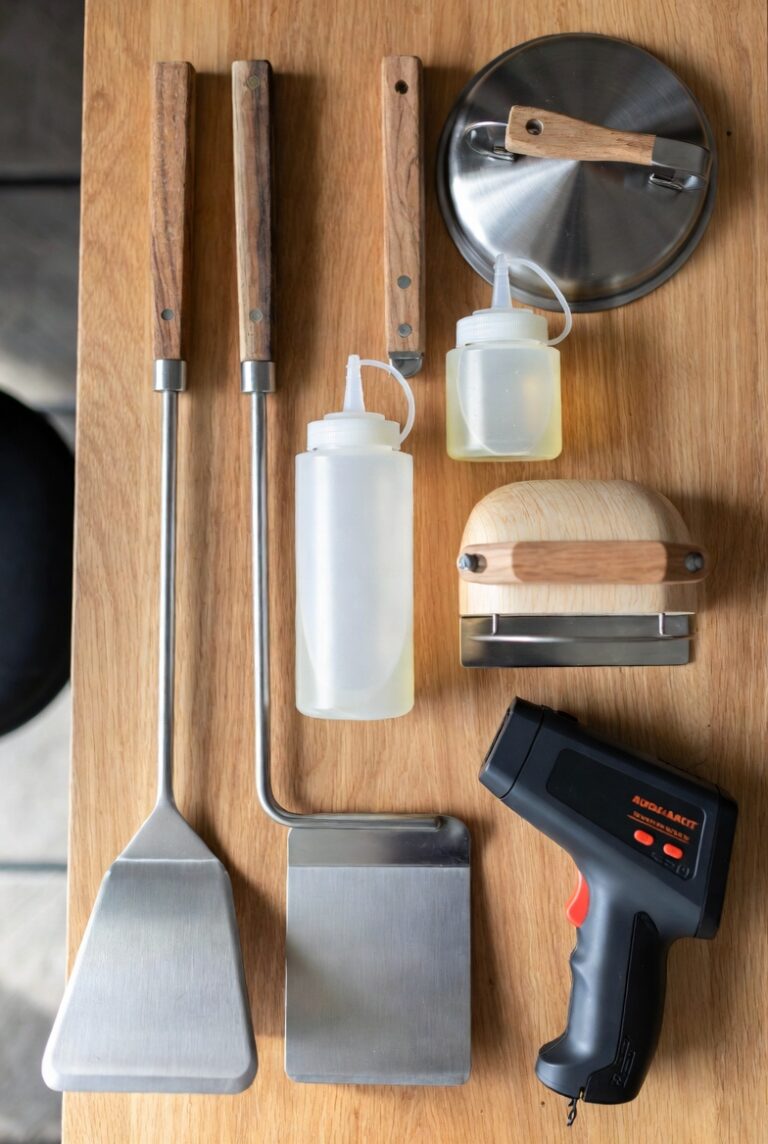
Here’s everything you need to get that rust off and restore your griddle. Most of this stuff you probably already have, and the rest you can grab at any hardware store or online.
- Metal scraper (the one that came with your Blackstone works great)
- Grill stone or griddle brick
- Kitchen-safe metal scouring pad or steel wool (fine grade works best)
- Paper towels (you’ll go through a bunch of these)
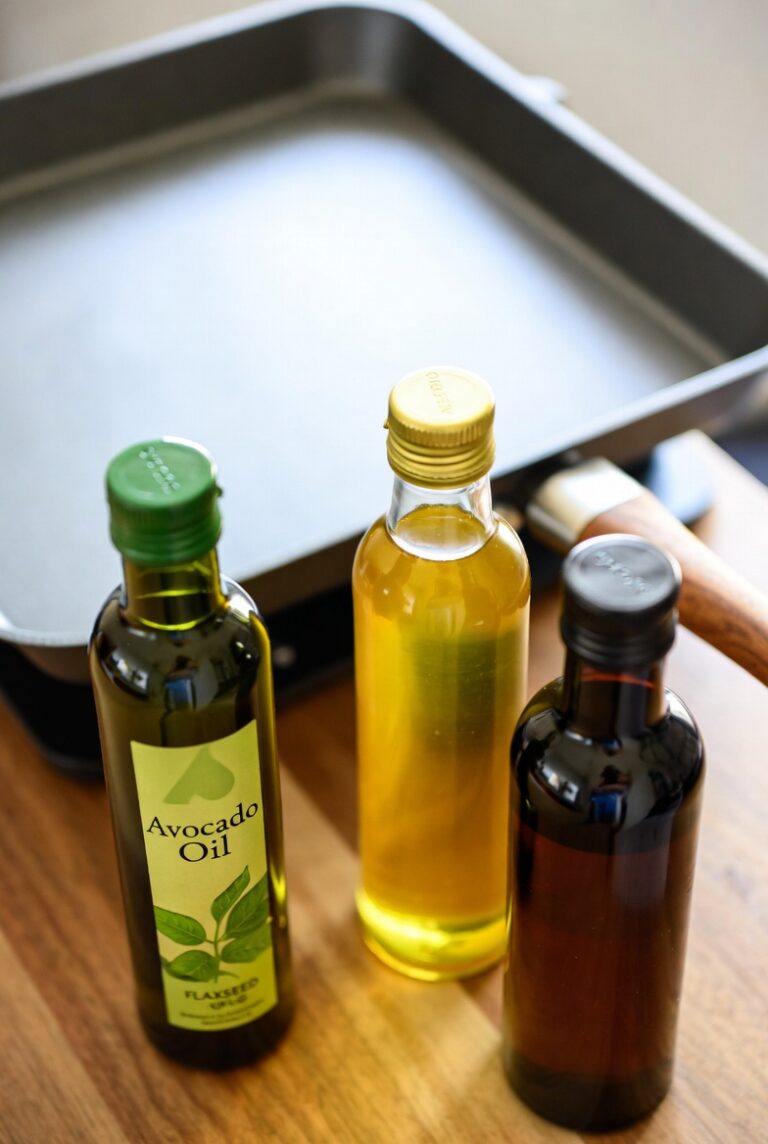
- High smoke point cooking oil (I use Blackstone’s own griddle seasoning oil, but canola, vegetable, or flaxseed oil all work fine)
- Heat-resistant gloves
- Water in a squeeze bottle or spray bottle
- Shop towels or old rags (optional but helpful)
Step-by-Step: How to Remove Rust and Restore Your Blackstone Griddle
Step 1: Assess the Damage
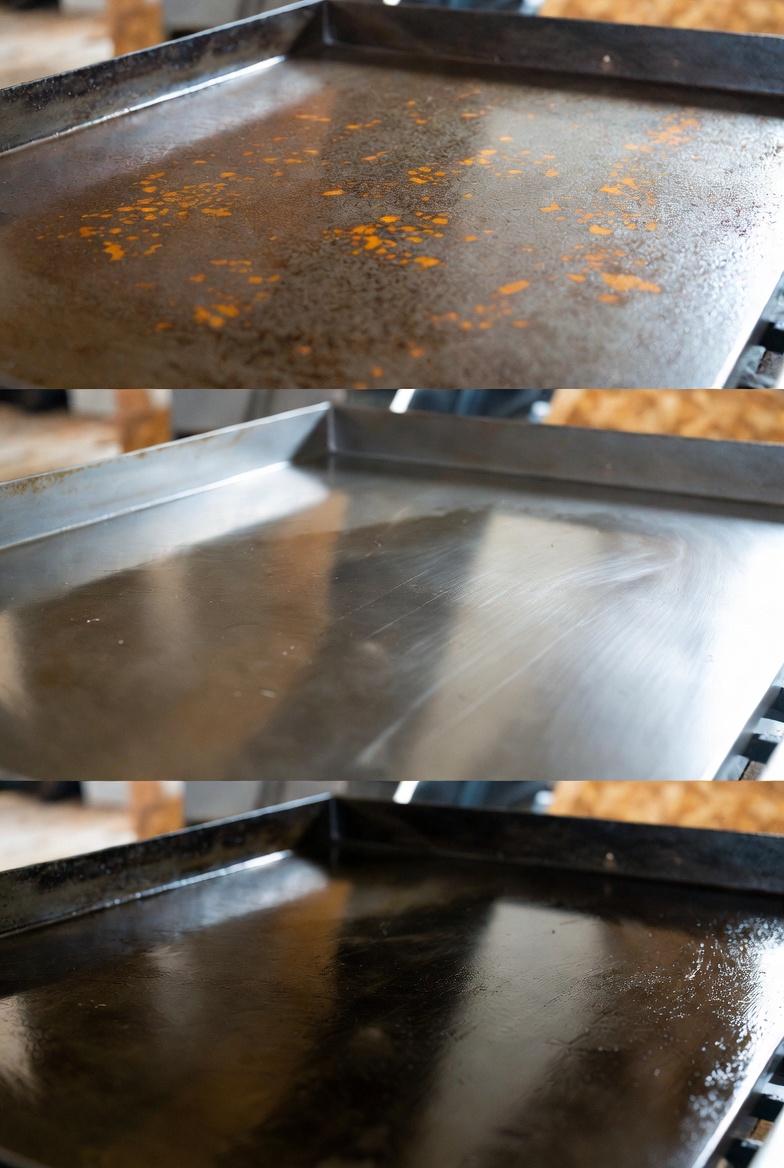
Before you start scrubbing, take a good look at what you’re dealing with. Is it just surface rust in a few spots, or is the whole griddle covered? This doesn’t change the process, but it’ll give you an idea of how much elbow grease you’re in for. Surface rust is that orange or reddish-brown coating that appears when the seasoning breaks down. It might look bad, but it’s just sitting on top of the steel, not eating through it. You’re good to fix this.
Step 2: Heat Up the Griddle
Turn all your burners to high and let the griddle heat up for about 10-15 minutes. You want it hot—like 500-550°F. This does a couple things. First, it makes the rust easier to scrape off. Second, it burns off any gunk or old food residue that might be hanging around. You might see some smoke during this phase, especially if there’s old seasoning or grease on there. That’s normal. Just let it burn off.
Step 3: Scrape the Hot Surface
Once the griddle is good and hot, use your metal scraper to start working on the rust. Hold it at about a 30-degree angle and push forward with some pressure. The heat makes the rust looser, so it should start coming off in flakes and powder. Work in sections, scraping in overlapping passes. Don’t worry about being gentle here—you’re not going to hurt the steel. Push hard enough to really remove the rust, but you don’t need to go crazy.
This is the part where you’ll really see progress. That rust that looked so permanent? It’s coming right off.
Step 4: Use a Grill Stone or Griddle Brick
After you’ve scraped off the bulk of the rust, grab your grill stone. Keep the griddle hot for this part. Add a small amount of water to the surface—just a few tablespoons in the area you’re working. The water will create steam and help lift the remaining rust. Take your grill stone and scrub in circular motions, applying firm pressure.
The grill stone will start to wear down as you scrub, and that’s exactly what it’s supposed to do. The abrasive material combined with the heat and water creates this paste that really gets into the surface and removes rust at a microscopic level. You’ll see the water turn orange or brown as it picks up the rust. That’s what you want. Keep scrubbing until that area looks clean and you’re down to bare metal.
Work in sections about 12 inches at a time. Add more water as needed, but don’t flood the surface. Just enough to keep things moving.
Step 5: Switch to Steel Wool for Stubborn Spots
If you’ve got rust spots that just won’t quit, turn off the heat and let the griddle cool down to warm (not cold, just cool enough to touch safely with gloves). Use fine-grade steel wool with a little bit of water to scrub those problem areas. Steel wool is more aggressive than the grill stone, so it’s perfect for rust that’s really dug in.
Scrub in circular motions with decent pressure. You’ll know you’re done when the surface feels smooth and you’re seeing consistent bare metal with no orange or brown discoloration.
Step 6: Clean Off All Residue
Once you’ve removed all the rust, you need to get all that rusty water and residue off the griddle. Use your scraper to push everything toward the grease trap. Then wipe down the entire surface with paper towels. You’ll probably go through 10-15 paper towels here. Keep wiping until the paper towels come away clean with no orange or brown color.
This step is important. Any rust residue left on the surface will interfere with the seasoning you’re about to apply.
Step 7: Re-Season the Griddle
Now comes the critical part: re-seasoning. This is what’s going to protect your griddle from rusting again. Turn all burners to high and let the clean griddle heat back up to about 500°F. You’ll know it’s ready when the surface stops smoking (it’ll smoke as any remaining moisture burns off).
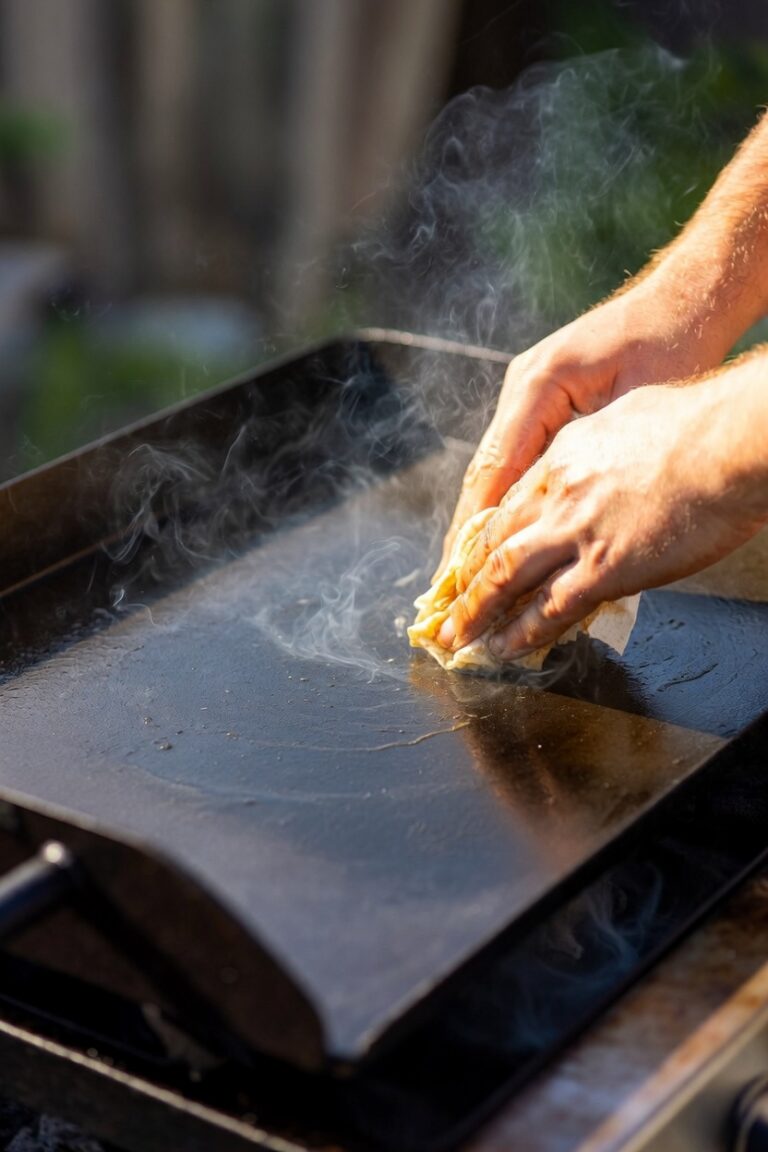
Pour about 2-3 tablespoons of your high smoke point oil onto the hot griddle. Use wadded-up paper towels (held with tongs or while wearing heat-resistant gloves) to spread that oil all over the entire surface. I mean everywhere—edge to edge, corner to corner, even up the sides a bit. You want the thinnest possible layer. If you can see puddles, you used too much. Wipe it thinner.
Let that oil cook onto the surface until it stops smoking and the griddle darkens. This takes about 15-20 minutes. The surface might look splotchy or uneven—some areas darker than others. That’s totally fine.
Step 8: Repeat the Seasoning Process
One coat of seasoning isn’t enough. You need at least 3-4 coats to build up a protective layer. So repeat step 7 at least three more times: oil, spread it thin, let it cook until it stops smoking, repeat. Each layer adds protection and makes the surface darker and more non-stick.
By the fourth coat, your griddle should be looking pretty dark and glossy. It might not be perfectly uniform in color yet, but that’s okay. Every time you cook, you’re adding more seasoning.
Step 9: Final Wipe Down
After your last seasoning coat has cooked on and the griddle has stopped smoking, add one more thin layer of oil and spread it around. This time, don’t let it cook. Just turn off the heat and let the griddle cool with that protective oil layer on it. This leaves it ready for next time and adds an extra barrier against moisture.
Pro Tips for Fixing and Preventing Rust
Don’t rush the seasoning coats. I know you want to be done, but thin layers that fully polymerize are way better than thick layers that stay gummy. Each coat should smoke like crazy, then stop smoking completely before you add the next one.
Work in sections if the rust is really bad. You don’t have to do the whole griddle at once. Clean and season one section at a time if that’s easier. The end result will be the same.
Use enough oil during seasoning but not too much. This is the mistake most people make. You need just enough oil to coat the surface when spread thin. If you can see puddles or thick spots, wipe more off. Thick oil doesn’t season properly and can leave sticky spots.
Keep the heat consistent during seasoning. Don’t crank the burners up and down. Keep them at high heat and let each oil layer do its thing. Consistent high heat is what bonds the oil to the steel.
Don’t use the hard lid during this process. If you’ve got a hard lid or cover on your Blackstone, take it off before you start. You need airflow during the cleaning and seasoning process.
A grill stone is worth every penny. Seriously, if you don’t have one, get one. It makes rust removal about ten times easier than trying to do everything with steel wool. You can find them for like 10 bucks.
Season the edges and sides too. Rust doesn’t just happen on the cooking surface. Get oil on the front edge, the sides, anywhere that’s exposed steel. Those areas rust too if you forget them.
Common Mistakes When Fixing a Rusty Griddle
Not getting the griddle hot enough before scraping. If you try to remove rust on a cold or lukewarm griddle, you’re going to be there all day. Heat makes everything easier. Get it hot first.
Using too much water with the grill stone. You need some water to create that scrubbing paste, but if you flood the surface, you’re just making a mess. A few tablespoons at a time is all you need.
Stopping after just one seasoning coat. One coat isn’t enough protection. The first time you introduce moisture to a single-coat surface, you’re likely to see rust again. Build up at least 3-4 coats for real protection.
Not wiping away all the rust residue before seasoning. If you leave rust dust or particles on the surface and then season over them, you’re trapping contamination under your seasoning layer. That seasoning won’t bond properly and will flake off. Clean thoroughly before you season.
Applying oil too thick during seasoning. This is huge. Thick oil doesn’t polymerize correctly. It stays sticky and gummy and doesn’t protect the steel. Thin layers are the secret. Spread it thin, then wipe it even thinner. It should barely look like there’s anything there.
Trying to use the griddle before the seasoning is complete. I get it, you want to cook. But if you start cooking before you’ve built up enough seasoning layers, you’re just going to scrape off the minimal protection you’ve added. Finish the job, then cook.
Freaking out about uneven coloring. Your griddle doesn’t need to be perfectly uniform black to be properly seasoned. Some areas might be darker than others, especially after rust removal and re-seasoning. That’s fine. It’ll even out over time as you cook.
How to Prevent Rust From Coming Back
Fixing rust once is fine. Having to do it every month is annoying. Here’s how to keep it from happening again.
Always apply a thin layer of oil after cooking. Every single time you use your Blackstone, before you turn it off, add a light coat of oil and spread it around. This is your rust insurance.
Use a cover. If your griddle lives outside, get a weather resistant cover. Moisture is the enemy of bare steel. A cover keeps rain, dew, and humidity away from your cooking surface.
Don’t let water sit on the surface. If you’re cleaning with water (which is fine), make sure you dry the surface afterward and apply oil. Never walk away from a wet griddle.
Cook regularly. Honestly, one of the best ways to prevent rust is to use your griddle often. Every time you cook, you’re maintaining and building up that seasoning layer. A griddle that gets used stays in better shape than one that sits unused for weeks.
Store it properly if you’re putting it away for winter. If you live somewhere with harsh winters and you’re storing your griddle, make sure it’s completely clean, apply a generous coat of oil, and cover it. Some people even apply a thicker layer of oil for long-term storage, almost like a protective coating.
Frequently Asked Questions
Can I use vinegar to remove rust from my Blackstone?
You can, but I don’t recommend it as your first choice. Vinegar is acidic and will remove rust, but it can also etch the steel if you leave it on too long. The heat and scraping method is faster and gives you more control. If you’ve got really stubborn rust and want to try vinegar, use a 50/50 mix of white vinegar and water, apply it to the rust, let it sit for 5-10 minutes, then scrub and rinse thoroughly. You’ll need to re-season immediately after.
Is rust on a Blackstone dangerous to cook on?
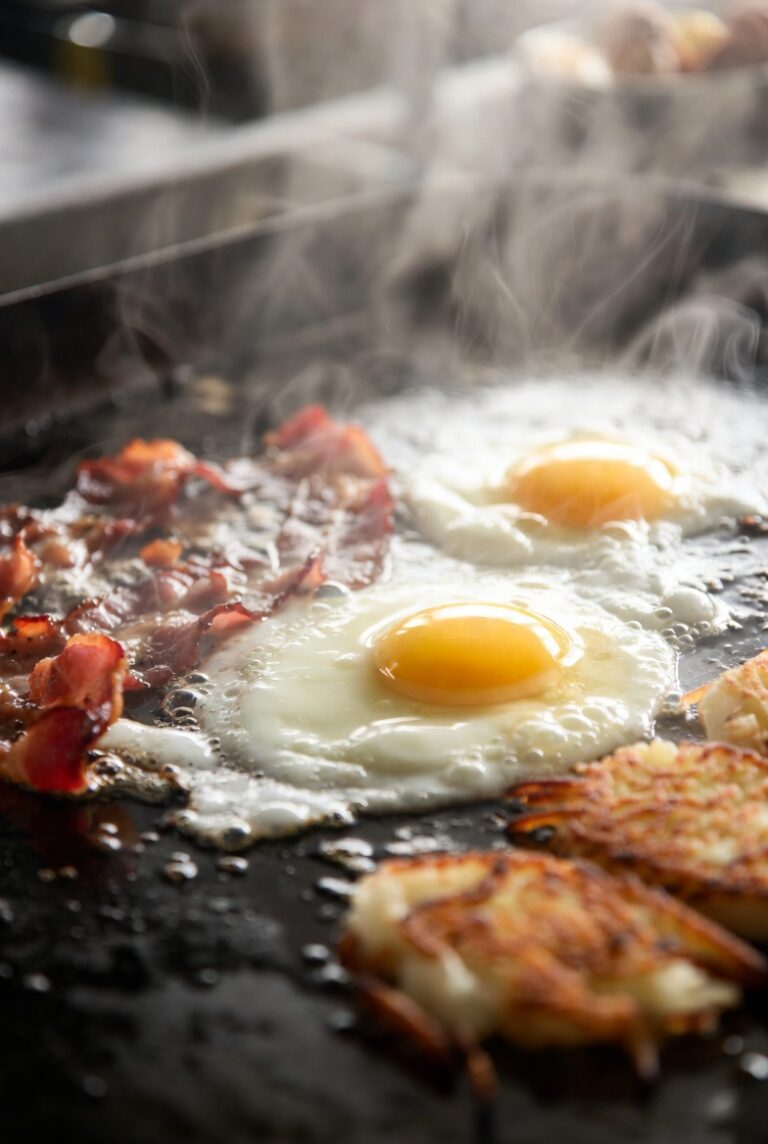
No, it’s not dangerous, but it’s not ideal. A little surface rust isn’t going to hurt you if you accidentally cooked on it. Iron oxide (rust) isn’t toxic. That said, you don’t want to cook on rust because it affects the taste of your food and prevents proper seasoning. Fix the rust, then cook.
How long does it take to fix a rusty Blackstone?
For light surface rust, you can have your griddle cleaned and re-seasoned in about 30-40 minutes. If the rust is heavy across the whole surface, give yourself an hour to 90 minutes. Most of that time is just waiting for seasoning coats to polymerize.
Do I need to remove all the old seasoning if there’s rust?
Not necessarily. You only need to remove the seasoning in areas where there’s rust or where the seasoning has flaked off. If you’ve got sections of good, intact seasoning, you can leave those alone and just work on the problem areas. That said, if the rust is widespread, you might end up removing most of the seasoning anyway just to get to all the rust.
What if the rust keeps coming back?
If rust keeps appearing after you’ve properly cleaned and seasoned, you’ve got a moisture problem. Either you’re not applying oil after cooking, your cover isn’t protecting the griddle properly, or there’s a humidity issue where you’re storing it. Make sure you’re oiling after every use and that the griddle is protected from the elements.
Can I use WD-40 or other rust removers on my Blackstone?
WD-40 will remove rust, but you absolutely cannot cook on a surface that’s had WD-40 on it without a ton of cleaning first. It’s not food-safe. If you go this route, you’ll need to scrub the surface thoroughly with soap and water (yes, soap is okay in this specific situation), rinse it completely, dry it, and then re-season. Honestly, it’s easier to just use heat and a grill stone and scraper. Skip the chemicals.
What type of oil is best for re-seasoning after rust removal?
Any high smoke point oil works. Flaxseed oil creates a really hard seasoning layer but it’s more expensive. Canola, vegetable, grapeseed, and avocado oil all work great. I use Blackstone’s griddle seasoning oil because it’s specifically formulated for this, but you don’t need to. Just avoid olive oil or butter—their smoke points are too low for proper seasoning.
Will rust damage my Blackstone permanently?
No. Surface rust doesn’t damage the steel. It’s just oxidation sitting on top. Unless you’ve got deep pitting corrosion (which is extremely rare and would require years of neglect), your griddle is fine. Remove the rust, re-season, and it’ll be as good as new.
Final Thoughts
Finding rust on your Blackstone feels like a disaster, but it’s honestly one of the easiest things to fix. You’re looking at less than an hour of work for most rust situations, and then your griddle is back in action. The key is not to panic and not to think your griddle is ruined. It’s not. It’s just steel that needs some attention.
The process is straightforward: heat it up, scrape off the rust, scrub it with a grill stone, clean off all the residue, and then build up several thin coats of seasoning. That’s it. You’re not doing surgery here. You’re just removing oxidation and rebuilding the protective layer that keeps oxidation from coming back.
Once you’ve fixed it, the best thing you can do is cook on it regularly and always leave it with a thin coat of oil when you’re done. Do those two things and rust won’t be a problem. Your Blackstone will develop a dark, smooth, non-stick surface that gets better every time you use it.
And look, the first time you see rust, it’s easy to think you screwed something up. But you didn’t. This happens to people. Weather changes, you miss oiling it one time, moisture gets under the cover—whatever. It’s not a reflection on you as a griddle owner. It’s just maintenance. Fix it and move on. Your next cook is going to be just as good as if the rust never happened.